Market Bags

I turned my final grades in on Saturday and now I’m taking this week off completely before I start all of my summer work. I’m not very good at deliberately taking time off, so I’m fighting the impulse to make myself a big to-do list for the week. So far, I’ve been sitting on the couch knitting, and I’ve managed to get to Raku Week in the most recent season of The Great Pottery Throw Down and finish up a sweater that I’ve had on the go for awhile. (I’ll share that in a bit once I’ve had a chance to block it.)

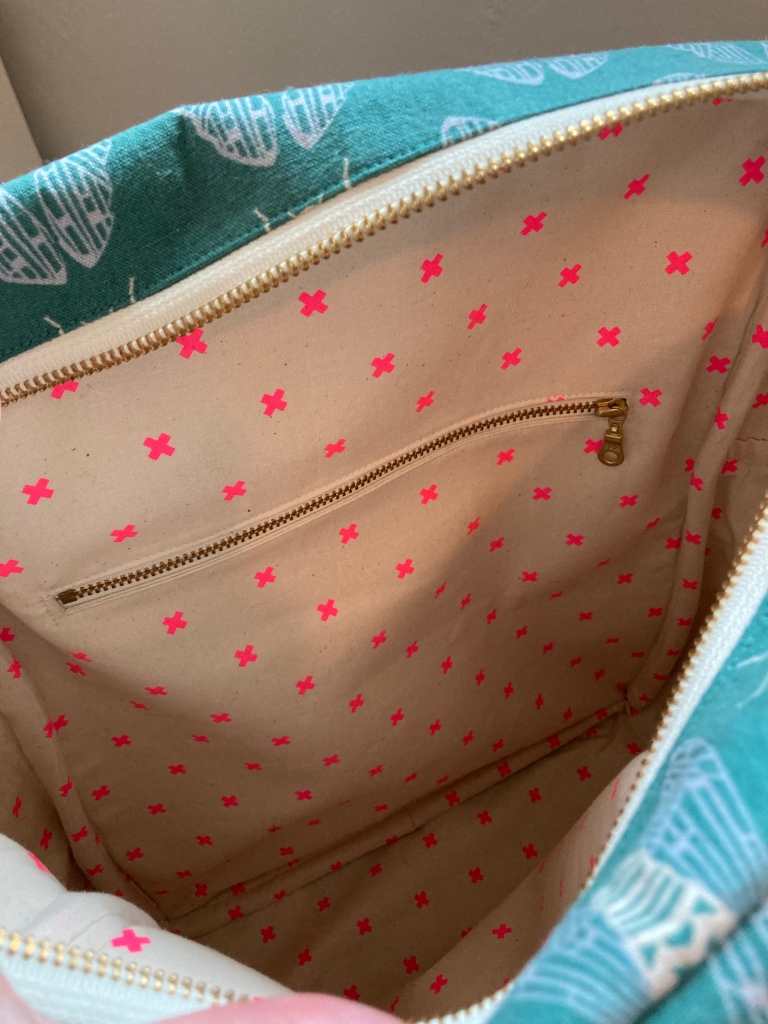
Last week, I had some training stuff to sit through, which gave me the chance to finish up my April crochet project—these two color-blocked market bags. I used a free pattern I found on Ravelry and some basic kitchen cotton from JoAnn’s, and now I have two new bags that have solved my ongoing issue of having to drag a weird pile of loose sheets and blankets in and out of school each week to get Jude and Silas’s nap stuff washed over the weekend. They also got lots of compliments from the teachers at school, so this might be a nice gift project. The pattern itself was very simple. The bottom and the top are just worked in single crochet and the mesh is an easy combo of chains and double crochet.

I took on this challenge of making a new crochet project every month on a whim, but I’m really enjoying it. I’ve known how to crochet for about as long as I’ve known how to knit, but I’ve done it so erratically that I usually have to look up tutorials to remind myself how to do very basic things. So taking up a new project each month is definitely helping to cement some of those skills, while also introducing me to new stitches and techniques and helping me develop a more even and desirable tension.

But there’s creative value to the challenge too, in that it’s helping me explore some of the possibilities of crochet. It’s an opportunity to explore what kinds of projects I like crocheting, a chance to discover new-to-me designers, and a way to develop a clearer sense of where and when I might prefer crochet or knitting for a specific type of project. I think I had also gotten to a place with knitting where I was stuck in a bit of a rut making the same kinds of things with the same kinds of yarns but not feeling particularly excited about any of it. Doing more crochet feels like it’s shaken something loose for me and helped me look at knitting again with fresher eyes and start to envision plans that feel more exciting while still feeling true to the kind of maker I am.

Anyway. I’m excited to see where the next eight months of crochet projects takes me—I don’t really plan them out in advance so I really don’t know month to month what I might end up doing. That’s part of the fun.

Project Details:

Pattern – Color Block Market Bag by Jenn Palmer

Yarn – Lily Sugar’n Cream in Ecru, Red, and Teal

Hook – H

The Cutting Table

My cutting table is done! This was my birthday present from Aidan this year and took a bit beyond my birthday to get finished because making things takes time and he had to do the bulk of the work on it outside, which created a lot of natural limits—especially given the extra cold and rainy weather we’ve had so far this spring. I don’t know a lot of the specific details because it was not my actual project and I ceded most of the details to Aidan’s expertise. But I know that it’s a little over 6’x3’ and that it’s a bit taller than counter-height and on casters so that I can move it around easily. I think Aidan started with this tutorial from the Closet Core blog as a rough starting point but then made a bunch of his own design and construction adjustments.

It goes without saying that it is very nice to have a spacious work surface that I can use without having to bend, which was never good for my back but is especially hard after the combination of aging and having two small children have made my lower back a very creaky, fragile zone. But this table has had a transformative effect on my sewing space and, maybe more importantly, the way that I think about that space.

On a practical level, the table has given me space to much a bunch of my cutting tools so that they are no longer cluttering up the desk where my machines are, and where they are out of the reach of my 1.5 year old who has a special radar for anything sharp or potentially hazardous. I also don’t need to keep shuffling my cutting mats and my rulers from corner to corner or surface to surface because they have a place where they are designed to stay. The top of the cutting table can house all of that stuff and be a bit cluttered because it is meant to be an active work space, and that means that the other surfaces that need to be less cluttered stay cleaner.

Aidan had Jude and Silas sign the underside of the table before he assembled it.

But the table makes what we previously referred to as my “office” feel like a studio, which is what I want. I spent several years in two different apartments storing my sewing machine on a large desk where I would push my machines to the side so that I could do work at home. I hated that setup. Things got a little better when we moved into our house and I had the space to get a separate desk to house my machines. The big desk was then mostly available for me to use for work without having to disturb my sewing stuff, although I also used it as a cutting surface (and it also regularly just collected all manner of crap). This was where I did nearly all of my work while I was teaching online during the pandemic—a time when I also did almost no actual sewing.

And that experience taught me that I have zero interest in a home office. I do not want working from home to be a thing that I can seamlessly shift to. (Especially now that we’re in a moment where there is increasing pressure to just “go virtual” for every sick day and every snow day, as though there is no significant time or effort or skill that goes into shifting between modalities at a moment’s notice.) And the cutting table means that working in my sewing space is now no longer really an option. That’s not what it’s built for. It gets to fully be a space that is for my making and my creativity. And if I decide that I am not going to work in my office on campus, then I can settle for the kitchen table, which is precisely what I am doing today. But we will not be going back to a moment where work swallows up my creative life.

Aidan at work. This lovely picture was actually taken by Jude!

Seamwork Lex Sweatshirt

I talked recently about all of my failed garment sewing over the past year or so, but I did recently make something that I am very happy with. After I finished up all of the quilts I had in progress over Spring Break, I knew I wanted to swing back to garment sewing and I knew I wanted (needed) an easy win. So I pulled out some French Terry that I bought last summer and decided to try the Seamwork Lex pattern, which is basically an oversized sweatshirt. My thought was that it’s much easier to get a win with a pattern that doesn’t require much in the way of fitting.

That thinking paid off and I did, indeed, get my easy win. I put this sweatshirt on as soon as I finished it and wore it for the rest of the day. And I’ve worn it every weekend since I finished it, making it one of the only things that has me feeling okay about the colder-than-normal spring weather we’re getting this year.

I am a Seamwork member and have one of the memberships that gives me access to the whole catalog of patterns. Is it worth it? I don’t know but I haven’t felt compelled to cancel it at this point. (I’ve also watched a lot of their classes, which is probably where I’ve felt the benefit of membership more.) I will say that I’m sometimes perplexed by Seamwork patterns or feel intimidated to begin them because I know the way they draft is off for my tastes. I find that they tend to include a lot more ease than I’d like (I made the Mel joggers at one point and cut one size smaller than my measurements indicated and still had to take the outer seams in by about the equivalent of another size and my fabric wasn’t even particularly stretchy). I find that their high necklines also tend to be very, very high, just like the rise on all of their pants. The issue is that I basically need to figure out what my “standard” adjustment for Seamwork patterns is and I haven’t been able to do that yet because 1) I haven’t been sewing much for myself and 2) I just started making muslins, like, a week ago. There aren’t a ton of Seamwork patterns that really pull me in but they do have several really good jackets that I want in my closet, so that’s my big drive for figuring out how to work with their patterns.

Anyway. I was less worried about fit with the Lex because it just doesn’t need to be fitted. I think I started with a size 20, based on my bust measurement, and then graded to a 22 at the hip. The pattern calls for a fairly stable medium-weight knit for the main fabric and then a ribbing with 50% stretch for the cuffs, bottom band, and neckband. I did not have access to a ribbing that would match my fabric so the bulk of the adjustments I made to this pattern were just focused on making it possible to use my main fabric for all the pieces that were supposed to be cut from ribbing. Because the terry had maybe ~20% stretch, I cut the largest size for the cuff and bottom band pieces, which worked out well. The neckline adjustment was more complicated—I first made the neckline wider and deeper (because, again, the Seamwork necklines are *very* high) and then I swapped out the neckband used by the pattern for a neckline binding since it required less stretch and wouldn’t add height to the neckline.

So, all told, this was an easy fitting win, but also still required some pattern adjustments and some critical thought about what it would mean to ditch the ribbing. But it was just the right caliber of pattern work to not stress me out and to make me feel more confident in my ability to make fit adjustments after a year of uninspiring garment projects. And it’s supposed to be in the 80s this weekend, but I might still try to wear this for awhile anyway because that’s how much I love it.

Project Details:

Pattern – Seamwork Lex

Fabric – Medium weight French terry (pretty sure it is a cotton/bamboo blend but I’m not 100% sure. I do know I bought it from Fabric.com and I think it is a Telio fabric?)

Size – Size 20 through shoulders and bust, graded to a 22 for the hip.

Pattern changes – wider, deeper neckline; neck binding instead of neck band; added width to hem band and cuffs to account for lack of stretch in fabric; did not use ribbing

Recent Knits

Just a short post today to share some of the knitting projects I’ve finished (sort of) recently. It’s the last week of classes for me, and I feel totally drained but I am determined to keep posting!

The first project is this Constellate Hat, which I started when my friend Abby asked if I’d be interested in doing a knit-along with her. I actually don’t knit a ton of hats, mostly because I find them kind of boring, but the stitch pattern on this pattern was really intriguing to me. And I’m glad she suggested making this pattern because:

  1. It was, indeed, an interesting stitch pattern to learn
  2. The pattern itself was written in an unusual style that was sort of frustrating at times but also kind of fascinating.
  3. I got to use a yarn that I love but has been sitting in my stash neglected for a very long time.
  4. I had been feeling very bored with knitting and so it was refreshing to take up a kind of impulsive project that was outside of the range of what I had been working on.
  5. It was fun and motivating to work on something with someone else.
  6. I ended up with a great hat.

I have not actually worn this hat because it is spring, and I am stubbornly refusing to wear anything other than a light jacket even though it is literally snowing outside as I write this. But I am excited to pull it back out in the fall.

The second project was an easy baby sweater for our new niece, Genevieve. I’ve made this pattern, The Playdate cardigan, a couple of times before—once for Jude and once for my nephew, Forrest. It’s a nice, easy way to showcase a great skein of fingering weight yarn, which was precisely what I wanted to do with this particular project. I’d had this skein of MadTosh Twist Light in my stash for years but couldn’t figure out exactly what I wanted to do with it. I think I originally bought it for socks, but it didn’t feel like the way I wanted to showcase the color. I think this baby sweater is a much better way to show off the fun little speckles of color. When it was finished, I went a little bananas and bought three different colors of buttons so I could really belabor the choice, but I think it was worth it in the end. The purple buttons really bring it together.

Right now, I’m working on the second sleeve of a Glenmore Aran for myself that isn’t worth photographing at the moment because I’m using black yarn and so it just looks like a mass of black. But I imagine that I’ll finish that up just in time to pack it away until October. Unless it keeps snowing.

Project Details:

Hat

Pattern – Constellate Hat by Hunter Hammerson

Yarn – Manos del Uruguay Fino in Peacock Plume

Size – This is a flexible pattern written for a range of sizes and gauges. My gauge was 7 sts/inch and I cast on 136 stitches.

Baby Sweater

Pattern – Playdate Cardigan by Tin Can Knits

Yarn – MadTosh Twist Light in Cosmic Silver

Size – 6-12 months

Getting Over My Fitting Hangups

I am trying to recommit to garment sewing right now. The combination of spring and the end of the semester always seem to give me some renewed sewing zeal. I don’t really participate in Me Made May, but seeing other people’s pledges and posts definitely gets me thinking about my closet and my handmade clothes. And the sun and the warmer weather and the relief of being done with grading makes me excited to spend more time in my sewing room.

Yanta Overalls I made last summer and have worn once. I also made a pair of black Arden pants which I have never worn. Just not my style.

It’s been a long time since I have been sewing seriously for myself. Or feels like a long time. I pretty much stopped when I was pregnant with Silas. Then tried to get back into the swing of things last summer and made a handful of garments but none of them ended up being things that I actually wore. The frustration with garment sewing was kind of what pushed me into engaging more seriously with quilting, which I’m grateful for. But I also don’t want to give up on garment sewing.

A Closet Core Tee that looks fine but has covert fit issues that make it very uncomfortable.

The biggest mental barrier for me is that I’ve just gotten really intimidated by the thought of fitting. Yes, I’ve successfully sewn a lot of things for myself in the past. But, my body has fluctuated a lot over the past five years, as you’d expect, through a combination of having babies and, you know, just living. So the feeling that my body is a bit of a moving target that I have to keep relearning is not helping. But I also have a clearer sense of the specific kinds of things that I would like to be making for myself (button up shirts, jeans, jackets), and those kinds of things seems especially intimidating to me on the fitting front. So intimidating that aside from a single pair of jeans and single dartless button up, I have really not attempted making these garments.

A Montrose Tee with screwy bust darts that I rarely wear because I don’t like this style of shirt and the fabric doesn’t feel great.

Part of it is pattern access. For a long time, there haven’t been the kinds of patterns I want to make in my size. I have very specifically been waiting for Grainline Patterns to release a version of the Archer shirt in their expanded size range for what feels like forever. And now Helen’s Closet Patterns has released the Cameron Button Up and Cashmerette has released the Vernon Shirt (they’ve had the Harrison for a while but a fitted princess seam shirt is not my preferred look). I have the Cashmerette Ames jeans pattern and an actual denim kit sitting in my stash, and there are a bunch of different jacket patterns that are in my size from a range of companies that I am excited to try.

Another Montrose I never wear for the same reason. The bust darts on this one are even worse.

I just haven’t been able to get past the mental block of fitting. So I’ve been trying to just work the problem. Seamwork released a class for members a few months ago called How to Fit with Confidence, which I worked my way through slowly. And then I used a gift card I got at Christmas to order a copy of Jenny Rushmore’s book Ahead of the Curve, which I just finished reading. Both resources work together nicely in that that present a shared process (measure, choose a size, make a muslin, address what you see) and a shared mindset (body stuff is hard but it will get easier over time to deal with your measurements, start small and aim for good enough, know that you will learn with each project and fitting will get faster and more intuitive over time).

Adjustments made!

So I’ve been trying to get out of my head about fitting by just leaning into the process. I avoided muslins for a long time because I started sewing in the era of sewing blogs where it seemed like everyone was posting muslins and making a million complex fitting adjustments and fixating on eliminating every possible wrinkle, and it all seemed very intimidating and also not at all fun. Both the Seamwork class and the book address that mindset and offer a more reasonable, low-key approach to making a muslin. So that’s what I’ve been doing. I made my first ever muslin (I think?) for the Cameron Shirt. I new I’d need an FBA and to add a dart, and instead of agonizing over how much to add or where to place the dart, I was able to figure both out really efficiently with the muslin. I’m even going to recut the fronts now that I’ve made an FBA to my pattern piece just to double-check the dart placement and the hip width and to ensure that the pocket markings will work for me, and then I think I’ll be ready to cut out my actual fabric. And I feel reasonably confident that I’ll end up with something that will fit me. And maybe leaning into the process will be the end of the mental block over fitting.

Flying Baby Quilt

Just a quick post today to talk about the third and final quilt I finished over Spring Break this year—a baby quilt for our new niece, Genevieve. I am really pleased with the final quilt and glad it’s off to its new home where it will hopefully be loved and used.

But the process of making the quilt, from the very beginning stages, was a frustrating object lesson in trusting my intuition. I started with a rough plan—picked a pattern and then decided I’d buy a fat quarter bundle of Ruby Star Society Heirloom and pick out a range of pinks and peaches and purples to use for the quilt blocks. I made those decisions early, in October of last year. And as soon as I tried pulling the colors and prints I wanted to use, I knew it was all wrong. It wasn’t going to come together to be what I wanted. Something about—something I couldn’t really name and still can’t name—was just off.

But I persisted, and kept trying to convince myself that it would be fine. I drew up quilt mock-ups and colored in the approximate fabric colors and layout and make Aidan look at it and tell me what he thought. I hung it up in my sewing room and convinced myself that it would look good. I kept pulling out the fabric over and over again and arranging it and rearranging it to tell myself the palette was right and a good match for the pattern. I went out and bought 3 yards of background fabric to complete what I needed for the top. I shopped and made plans for what I’d buy for the backing and what I’d use for the binding. And then when it finally came time to get started with the quilt, I got honest with myself, kicked all the plans to the curb, and went back to searching for a new pattern.

The good thing is that once I just accepted that what I had been planning wasn’t going to work, finding a new pattern and pulling a new set of fabrics that would work together was fairly easy. It didn’t even take me long to find the perfect backing fabric—a minky rainbow print in basically the same color palette I’d used for the quilt top. I’ve never used minky to back a quilt before, and this is where I should have again trusted my intuition. The primary concern that people have with minky as a quilt backing is that it’s actually a knit and it stretches. I am not intimidated by stretch fabrics. I have worked with all kinds of knits. I know how they behave. I know how to handle them.

But I still got in my head about basting the quilt together, and decided to follow advice I’d seen online from people who insisted that spray basting was the ONLY way to keep the minky from shifting all over the place while quilting. Some people love spray basting, which is great. I don’t. I much prefer the process of pin basting and I like the flexibility that comes with being able to adjust and repin if necessary. I kept trying to figure out why that wouldn’t work with minky backing—kept trying to understand why I couldn’t get by with pin basting and a little extra attention towards making sure I wasn’t getting any puckers on the back. I couldn’t see what it would be necessary and dreaded the whole spray basting process the whole time but did it anyway.

And it ended up being a big mistake. The minky did not shift, but the quilt top did. I had to fight through the entire quilting process to avoid puckers in the top, which is a problem I’ve never had with pin basting. I had to rip out so many areas of quilting and redo them. I had to pry the basted quilt top off the batting in two places so that I could adjust it. None of this is to say that spray basting is categorically terrible, obviously. I’m sure I’d have had a much easier time if I was more skilled and familiar with spray basting. But it sure as shit wasn’t any easier than pin basting, and I should have just gone with what I knew and what I felt good about.

Oh well. It’s done now. And finishing touches plus a good wash have mitigated most of the rough parts of the quilting. Will I learn my lesson and not second guess myself so much in the future? (Probably not.)

Project Details:

Pattern: Flying by Quilty Love

Size: Approximately 41” x 48”

Quilt top fabrics: Kona Cotton in Snow and six fat quarters from a Ruby Star Society Heirloom bundle

Batting: 80/20 Cotton blend batting from the Fat Quarter Shop

Backing: Dear Stella Minky in rainbow print

Quilting: 1.5” straight grid in all-purpose thread

Cicada Making Backpack

This project is almost a year old at this point, but it’s on my mind because I just pulled it out again after using a different backpack throughout the winter. I planned this project about a year before I actually got around to sewing it, so I bought the cicada print canvas (which I think is another pre-Ruby Star Society print from Cotton + Steel, but I might be wrong about that) before I had an inkling that Brood X was going to emerge in Cincinnati in late May 2021—right after I actually finish sewing this. But still, I guess it’s a nice way to memorialize the several weeks we spent besieged by dive bombing bugs and exoskeleton litter and gross cicada larvae and incessant buzzing.

This backpack was the first major project I took on after having Silas. I had done some very easy sewing prior to that, like making a few pairs of pajamas for Jude in the fall when I was still at home on parental leave with Silas. But at some point in the winter of 2020-2021, I just stopped sewing completely. I was teaching 4 classes online, I was getting very limited and fractured sleep, and I was having to dedicate an hour+ of my day to pumping, which is ridiculous. It got to a point where keeping my head above water with my classes required working every night after Jude and Silas were both in bed, as well as working every weekend. By the time I got the end of the semester, I was completely burned out and demoralized. I was lucky that I was able to hand off the summer class I had originally agreed to teach in Summer 2021, which lightened my load over the summer and meant I could focus on just recovering from the spring semester.

I launched my creative recovery by 1) watching The Great Pottery Throw-Down, 2) doing the Design Your Wardrobe class on Seamwork, and 3) making this backpack. The pattern is the Making Backpack by Anna Graham, and I’ve worked with a handful of her patterns before and appreciate the clarity of her instructions. I don’t have extensive bag making experience, so I found all the different kinds of interfacing and various steps fairly intimidating. But I just leaned into the process and focused on one step at the time. The result was a really healing (is that cheesy? I don’t care) sewing process where I got to do the kind of complex, precise work that I enjoy without having to worry about fitting my postpartum body and where I got to see a really beautiful object come together in my hands.

I used this as my everyday bag throughout the summer and fall, swapped it out for a darker backpack for winter, but just brought the cicadas back out. I actually missed carrying this bag around, which tells me I need to make myself something that feels more seasonally appropriate for winter. I’ve got my eye on Anna Graham’s Buckthorn Backpack pattern.

Project Details

  • Pattern: The Making Backpack by Anna Graham (Noodlehead Patterns)
  • Fabric: Exterior fabric is a Cotton + Steel cotton and linen blend canvas and the interior is also an old Cotton + Steel print. I’m pretty sure these are both pre-Ruby Star Society designs, but I’m not 100% sure.
  • Notions: I bought a notions kit from Anna Graham’s shop that had all the canvas strapping, bag sliders, zippers and a little leather patch. It was great to have everything together and I would absolutely go back to her store for notions kits or for sourcing individual notions in the future.
  • Interfacing: I don’t know. There are 3 different kinds of interfacing on this bag, I think? The pattern has very specific recommendations, which I followed. I was able to find exactly what was recommended at Joann’s, and it all worked out really well.

Home Street Quilt Wall Hanging

Another quilt! This was another of my spring break finishes, and it’s just a small wall hanging version of the Home Street Quilt from The Blanket Statement. I was immediately drawn to this pattern when it was released and decided to participate in the quilt along Erin hosted. My hope was that the quilt along would offer a few tips and tricks to help me expand some of my basic quilting skills since this is a self-taught hobby for me and I’ve been figuring it out as I go. And I did, indeed, learn some really valuable stuff from the quilt along—stuff that ensured that this quilt turned out well but stuff that I’ve already applied to other projects. So it turned out the be a really useful experience and a nice middle point between just trying to learn from working with a particular pattern and taking a more formal class.

Speaking of resources for self-taught quilters, the actual quilting I did on this was inspired by the “gentle curves” motif described in the book Walk: Master Machine Quilting with Your Walking Foot by Jackie Gehring. This is such a great book, and I’m glad I have my own copy now. I really enjoy the process of quilting with my home machine with a walking foot, and this book offers some really helpful tips for success and then a bunch of different examples of motifs you can easily achieve with a walking foot. I generally like the look of fairly dense, fairly minimalist quilting, but I also don’t want to just stick with straight lines or basic grids without ever trying to branch out. And this book has some really helpful examples of motifs that I think will help me continue to stretch my skills but that will also always help me find just the right match for whatever quilt top design I’m working with.

I made this piece to hang in my office on campus. The fluorescent lighting probably isn’t doing it any favors in terms of displaying it, but I like getting to look at it everyday. This is one of my favorite things I’ve made, and its nice to be able to look up from my desk on a particularly frustrating day (of which there are many at this point in the academic year) and just be reminded that, at the end of the day, I can make some pretty cool shit.

Since I came back from Spring Break, I’ve had a few different things where I have to engage in prolonged professional small talk, either with people I only know through work or don’t know at all.  And I’ve been struck by the fact that when people are talking about what they do in their free time (or whatever free time they’re willing to admit they have in these situations where people feel compelled to present themselves as working constantly), I actually have very little interest in talking about the things I make. I’ve talked about shows I’ve watched and books I’ve read and things my kids have done or said. But I don’t feel inclined to share my craft interests, and when I have shared a bit, I’ve kind of wished I hadn’t.

I think there’s sometimes an innate value given to things like writing poetry or playing music or even cooking and baking. There’s less of a sense of craft as clearly valuable and interesting. And I don’t have any shame or any apologies about what I do or how I spend my time—I mean, I wear the clothes I make and use the backpack I sewed and have decorated my office with quilts and needlework projects. I’ve written about making my own clothes. I have this blog and a public Instagram account. People vaguely know that I make things, but a lot of people don’t really know what that looks like for me. And that is fine. I don’t feel like I need to hide anything, but I also am not particularly interested in being a craft ambassador. I’m happy to talk about this quilt with anyone who asks about it, but I prefer to wait and keep the fuller view of my creative life in reserve to share with people I know will respect it.

Project Details

  • Pattern: Home Street Quilt from The Blanket Statement
  • Quilt top fabric: 4 prints from a Ruby Star Society Heirloom fat quarter bundle plus cotton chambray shirting left over from a previous project and some undyed muslin
  • Quilt back fabric: an old (pre-Ruby Star Society) Cotton + Steel print that’s been in my stash forever
  • Batting: leftover 80/20 cotton poly batting

Geese in Flight Quilt

I mentioned this in a recent post, but over my Spring Break, I made it a goal to finish up three quilts that were laying around my sewing room partially completed, and I actually succeeded in getting all three done! Here’s the first.

All I needed to do over Spring Break on this quilt was hand-sew the binding, but it’s a twin-size quilt, so it took me ~8 hours. And that is precisely why I procrastinated on finishing the binding for about two months. But that is basically how this quilt has come together—I would work on it for a while, approach a step that stumped me or seemed to onerous at the time, and then set it aside for a good chunk of time until I was ready to pick it back up. And with a quilt, why not do precisely that? Unlike a garment, there’s no chance my measurements are going to change before I come back to it. No chance that it will go out of style or be the wrong season by the time that I finish it.

I actually worked on this piece for two years. I saw a post from Anna Graham of Noodle-Head showing this exact quilt, which is worked up in prints from her Driftless collection with Robert Kaufman. I had been talking about making us a “picnic quilt” to take camping with us or to lay down in the grass, but I couldn’t pick a pattern or fabric. And then when I saw this, I knew it was exactly what I wanted and when I saw a kit for the quilt posted on Instagram, I bought it immediately. I think that was January or February 2020? In March, when we were all sent home, this quilt was the very first project I started working on.

To me, this quilt represents a ton of learning. It was basically my crash course in quilting. Prior to starting this, I had made one baby-size quilt for Jude that involved just sewing together pre-cut strips from a jelly roll. So that project familiarized me with the basics of the quilting process but didn’t require that I really learn any more precise or specific quilting skills that would help me with more complex projects. (It also didn’t make me fall in love with quilting. I was happy with the quilt when it was finished but had no real desire to launch into another quilting project until I got the kit for this one.)

So when I started this quilt, I had never used a rotary cutter, cut fabric for a quilt, followed a quilt pattern, pieced together quilt blocks, trimmed quilt blocks to size, arranged blocks for the top, or had to worry about a scant ¼” seam. I could have slowly built up some of these skills by working through more simple patterns or by seeking out more formal guidance through a class or videos or a book. But instead I just launched into this pattern (which is clearly marked as an intermediate level pattern) and learned by making mistakes and encountering problems and then having to figure out how to solve them. It’s not everyone’s preferred method, but it is incredibly effective.

Spot the photo assistant. Lol.

This is one of those pieces where, up close, I can see all the mistakes and the imperfections. But I also don’t really care about them. For one thing, they aren’t actually visible from a distance. For another thing, none of those imperfections will have any impact on how much we use and appreciate this quilt. But more importantly, through all of those mistakes, I learned a ton. I fell in love with the process. I feel like this is the quilt that made me a quilter.

The Details:

  • Pattern: Geese in Flight by Jeni Baker
  • Fabric: various prints from the Driftless collection (which was printed on Essex linen–I don’t think its available anymore) plus Kona Cotton in Gotham for the top and binding, Interrupted Signal print from the Art Gallery Star Gazer collection for the backing
  • Batting: bamboo/cotton blend
  • Quilting: Horizontal straight-line quilting (done with a walking foot) done at ¾” intervals
  • Size: Twin size (~70″ x 85″)

Neon Rainbow Sweater Plans

Today is my birthday! I’m very lucky because, this year, Aidan is building me a cutting table for my sewing room as a birthday gift. I am obviously very excited about it. But I also bought myself a little yarn gift this year.

A couple of weekends ago, I needed to sit down and work on hand sewing a quilt binding. I knew it was going to take a good amount of time, so instead of spending naptime on the weekend up in my sewing room like I usually do, I sat down on the couch and watched some movies while I worked on the binding. The first movie I watched was Wine Country, which I’ve already seen and which I enjoyed the first time around but thought was even better and even funnier the second time.

White wine. It’s called white wine.

But while I was watching, I was also taken in by a sweater Amy Poehler’s character wears during their vineyard tours. It’s a basic navy, crewneck sweater with a band of neon rainbow stripes on the chest. I immediately started visualizing a plan for making myself a similar version and, two days later, found just the right yarn for the stripes (from Forgotten Fibers on Etsy) and decided it was just the right time of year to buy myself a birthday gift.

I think these mini skeins will be just the right amount of yarn for working up some thin bands of color on the sweater. And I think I’m going to use the Ravelston Pullover as a base pattern for what I’m planning. Since I’m making my own version, I’m also planning to swap out navy for my preferred neutral base, which is a charcoal gray. I haven’t bought that yarn yet, but I’m thinking I’ll use either Cascade Heritage in Charcoal or Valley Yarns Huntington in Dark Grey Heather—I just need to decide how dark I want my base to be.

Huntington in Dark Grey Heather. Based on project photos on Ravelry, I’m pretty sure this is noticeably darker than Heritage in Charcoal.

I don’t think I’m going to get around to starting this for a bit, but I’m excited about the plan. I think I mentioned in my last post that I’ve been feeling a little bored with knitting. It’s not that I don’t want to knit—I very much do—but rather that I’m looking for a way to rediscover the spark that was more present earlier in my knitting life. And this is one of the projects that is helping with that. I’m excited to get this going, excited to do the math to figure out stripe placement, excited that I have an idea but I can’t quite fully visualize what the final project will look like right now. All of that is giving me some knitting energy right now.