Assorted Thoughts and Plans

Knitting

My Apres Surf Hoodie is a bust. It’s just too snug and the snugness isn’t easily resolved. I think part of the problem is that it’s hard to measure gauge on an overall stitch pattern. But I suspect a bigger part of the problem is that I switched the way that I was working my SSKs about 2/3 of the way through the back. I also should have blocked my pieces as I finished them to make sure that they were knitting up to the appropriate size, but I didn’t. Oh well. I still really want this sweater, so I’m going to just put it aside for now until I’m emotionally ready to rip and reknit.

Grandpa Cardigan

On a more optimistic knitting note, I’ve finished my Grandpa cardigan. It just needs a bath and some buttons and it will be all ready for the dip in temperature that we’ve got coming up this weekend. More pictures and details to come shortly.

Gloomy Pullover in Progress

I also started a new pullover. I’m using some Cascade 220 Fingering in a heathered black. I had first planned to use the yarn to make Carpino, but that pattern was written for Brooklyn Tweed Loft which is apparently closer to a sport weight than an actual fingering weight. Cascade 220 Fingering is firmly a fingering weight, so the stitch pattern looked terrible at the recommended pattern gauge. So I switched gears and decided to try making Catkin, but the dark color of the yarn combined with the heathering effect meant that the stitch pattern wasn’t really visible. So now I’m improvising a simple light-weight pullover. So far, it’s all stockinette knit in the round, which feels wonderfully meditative at the moment.

Sewing

I managed a small bit of sewing over the last week and have been thinking a lot about what I want to make over the next few months. Here are some of the things I’ve got my eye on:

M6658

I’m planning some very basic t-shirts in very basic colors that will really just become shirts for layering. Boring, but useful. The black and gray fabrics are both cotton-spandex blends and the white is an organic cotton interlock. I’m planning to use the V-neck t-shirt pattern included in McCalls 6658, which is the same pattern I used to make my recent vine-print tank top.

Knit top plans

I’ve also got some more interesting knit tops planned. From left to right, I’ve got the Jalie scarf top that I’m planning to make up in a dark teal rayon-spandex blend, Vogue 8831 (a raglan pullover with a cowl neck) which I’m planning to make with a black rayon sweater knit, and McCalls 7018 (a jersey button-down), which I planning to to make in a heathered black cotton jersey.

Burda zipper raglan

I also have a gray cotton jersey that actually feels somewhere between a traditional jersey and a sweater knit, and I’m planning to use that fabric to make this zippered Burda raglan top.

McCalls button downs

These shirts are probably more aspirational than the other projects I’m planning, but I’ve got a white cotton broadcloth that I want to use to make a basic button down using McCalls 6649 (sans color blocking, thank you very much). I’ve also got this polka dot rayon challis that should work nicely with McCalls 6436.

I’ve been knitting long enough that starting a new project or picking up my knitting whenever I have a bit of time isn’t a challenge. But sewing isn’t as intuitive for me at this stage, and when I’ve stopped doing it for awhile, getting back into it starts to feel really daunting. So I’m going to aim to squeeze in 15 minutes of sewing everyday. I’m hoping this will help me work my way through the fabric and patterns I’ve been accumulating while also keeping me from feeling like I need hours of uninterrupted time to get any sewing done.

Baking

Apple Zucchini Muffins

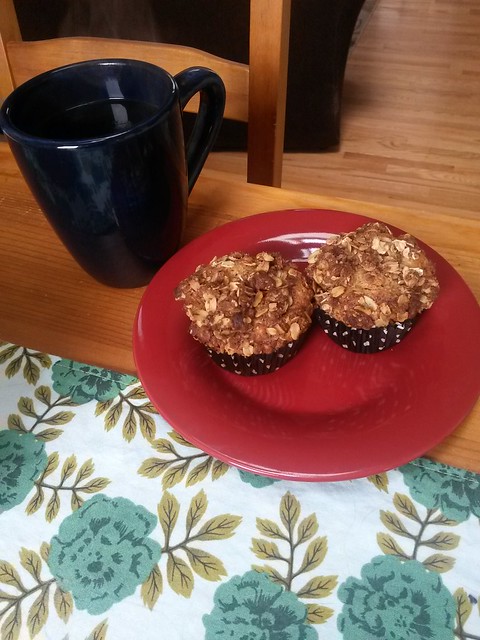
I’ve been doing some simple baking lately—easy stuff like banana bread (I’ve been using this recipe from Simply Recipes and it’s great). I made these apple zucchini muffins two weeks ago and they were really, really good. Good enough that I’ll definitely be making these again soon. I substituted a pinch of allspice for the cardamom and used 1/2 a cup of vegetable oil instead of 1/4 cup because I didn’t have any applesauce on hand. The best part about these muffins is that, unlike a lot of muffins, they stay good for days.

TV

Aidan and I have been watching Star Trek: Deep Space Nine and are at the beginning of season 3. Kira Nerys has officially joined the ranks of my all-time favorite female TV characters. She’s pretty much on the level of Dana Scully in terms of the depth of my love for her. My favorite things about her include: her ongoing distrust of the Federation, her salty attitude, and her Bechdel-test approved friendship with Jadzia Dax.

DS9-Stills-major-kira-nerys-12090311-500-641

I also appreciate the fact that 90% of her smiles are sarcastic. She is a woman after my own heart.

Apple Cinnamon Scones

My semester is done! I’ve powered through the stack of final exams, tallied the final grades, and pushed all the papers that need pushing to wrap up the last 15 weeks of teaching. Of course, I’m still writing and researching and generally chipping away at my dissertation, but the end of the semester means a bit more time for sewing, holiday baking, and catching up on some blog posts.

Apple Cinnamon Scones via sweetalchemy.wordpress.com

These scones were a last minute addition to our Thanksgiving menu when I decided the day before that I’d like something special for breakfast Thanksgiving morning. I wanted to use some apples that we had on hand and Aidan wanted scones, and thus began the hunt for an appropriate recipe. I’ve made these apple cinnamon scones from King Arthur Flour before, and they were excellent. Unfortunately, the recipe calls for several ingredients that I didn’t have on hand, and there was no part of me that was willing to brave the grocery store just for scones. Since sour cream was the best liquid I had on hand (it’s weird to think of sour cream as a liquid, but it functions as one in baking), I started looking for a sour cream scone recipe that I could tweak a bit to make apple scones.

Apple Cinnamon Scones via sweetalchemy.wordpress.com

Ultimately, I ended up adapting a recipe from The Kitchn for Sour Cream Strawberry Scones. I omitted the brown sugar crumble topping called for in the recipe, swapped the strawberries for a chopped apple, and added some cinnamon to the batter. In the end, these scones turned out well and were a great way to kick off our holiday. The sour cream gives them a good flavor and a nice, tender texture. They are only slightly sweet—appropriate for breakfast and not the kind of scone that you would mistake for dessert. If you like a sweeter scone, it would be easy to add a bit more sugar. Perhaps 1/2 a cup instead of 1/4. Using the crumble called for in the original recipe might also make the scones a bit sweeter. The next time I make these, I might also toss the chopped apple in a cinnamon sugar mix before adding them to the batter. Regardless, this is a solid recipe. And the best part is that you can make these scones the night before—just mix up the batter, shape the dough, cover with plastic wrap, and keep them in the refrigerator overnight. I’m looking forward to making it with strawberries when winter is over—perhaps as a way to celebrate the end of the spring semester!

________________________________________________

Apple Cinnamon Scones (adapted from The Kitchn)

  • 2 c all-purpose flour
  • 1/4 c sugar
  • 2 tsp baking powder
  • 1/2 tsp baking soda
  • 1/4 tsp salt
  • 1 tsp cinnamon
  • 1/2 c (1 stick) cold unsalted butter, cut into small pieces
  • 3/4 c sour cream
  • 1 large egg
  • 1 tsp vanilla
  • 1 medium apple, chopped

For the topping:

  • 3 tbsp sugar
  • 1/2 tsp cinnamon
  1. Whisk the dry ingredients together in a medium mixing bowl. Using a pastry cutter, cut the butter into the flour mixture until it resembles a course meal.
  2. In a small bowl or measuring cup, whisk together the sour cream, egg, and vanilla. Add the sour cream mix to the flour mix and, using a wooden spoon or spatula, fold the sour cream mix into the dry mix. When almost all of the flour has been incorporated, turn the dough out onto counter.
  3. Gently pat the dough into a rectangle and sprinkle half of the chopped apple over the surface of the dough. Fold the dough in half and again pat it into a rectangle. Sprinkle the second half of the apples over the surface of the dough and fold the dough in half a second time.
  4. Transfer the dough to a baking sheet lined with parchment paper. Pat the dough into a large disk about 1” thick. Place the pan in the refrigerator for at least an hour.
  5. Half an hour before baking, preheat the oven to 400 degrees F. Combine the sugar and cinnamon for the topping. When the oven is fully heated, brush the top of the dough with some milk and generously sprinkle the cinnamon sugar mixture over the dough. Using a bench scraper, knife, or pizza cutter, cut the scone dough into 8 wedges. Pull the scones apart so that there is at least an inch between each scone.
  6. Bake the scones for 18-20 minutes until they are golden brown and the sides of the scones are firm. Allow them to sit on the baking sheet for 5 minutes before transferring the scones to a wire rack. The scones are best served warm.

Basic Applesauce (Unsweetened)

Recently, our friends went apple picking and asked me if I would be willing to turn some of their apples into pie. I, of course, was willing, and used several of the apples they gave me to make my standard apple pie recipe. But I also ended up with several apples leftover and decided to go ahead and turn them into some unsweetened applesauce for their toddler, my godson.

This is the first time I’ve made applesauce, and I have three thoughts. First, I really had no idea it would be so damn easy. Second, I had no idea it would be so much better than the bland stuff you buy in a jar. And third, I have no idea why you would want to add sugar to it in the first place.

See, I tend to err on the side of decadence, and if I hadn’t been planning for this to be eaten by my godson, knowing his parents wouldn’t want him scarfing down something laced with sugar, I would have just defaulted to a run of the mill, sweetened recipe. As it turns out, if you start out with some good fruit, let it simmer for about an hour, and spice it up just right, it will taste perfectly tart and sweet on its on. And it also won’t taste watery and weak like every commercial variety I’ve ever tried.

Apples ready to simmer

So while it’s true that this applesauce is unsweetened, I struggle with calling it “unsweetened applesauce” because that makes it sound like it’s a bland punishment or like it’s second best to a sweetened variety. It’s neither of those things. It’s just a really good, really simple applesauce. My godson scarfed down two bowls the night I brought this over (while refusing the bite of pie he was offered!), so I think he agrees.

Applesauce, finished

The flavor depends in large part on the apples that you are using, so you definitely want to use ripe, in-season apples. I also think a sweet-tart apple will give you a nice balance of flavor in the resulting apple sauce. The apples I used were primarily MacIntosh and Gala apples, but I remember seeing an episode of America’s Test Kitchen where they argued that Pink Lady apples yielded the best applesauce. Since I’m giving this batch of applesauce to my friends, I think I’m going to have to go get some Pink Lady apples and make another batch for myself.

Basic Applesauce

Notes: First, I didn’t peel my apples and pureed the skins with the rest of the sauce. This resulted in a slightly chunkier sauce, but neither my godson nor myself had any textural aversions to the skin.  For a smoother product, just peel the apples before you core and quarter them. Second, the ingredients I’ve listed below just indicate the way that I spiced this batch. I erred on the side of more lightly spiced since this was going to be eaten by a toddler. As is, I think the recipe amount of cinnamon and cloves provide enough flavor without overpowering the fruit, but you could easily create a more heavily spiced version by adding whole cloves or even by adding a bit of allspice or ginger.

  • 10-12 small or medium apples (more if your apples are on the smaller side, less if they’re bigger)
  • 2 cinnamon sticks
  • Pinch of ground cloves
  1. Peel your apples, if desired (see the note above). Core the apples and cut them into quarters. Or, if you don’t have a corer, cut the apples into quarters and then cut the cores out. Whatever.
  2. Add 2-3 cups of water to the pot. The water should reach the half point of where the apples are in the pot. In other words, if your apples are about 4″ deep in the pot, you want to fill the pot with about 2 inches of water. You can always add more water if you need it, but you don’t want your applesauce to be too watery.
  3. Bring the water to a boil, and boil the apples on high for 10 minutes. After ten minutes, the apples should begin breaking down.
  4. Turn the heat down to low and add the cinnamon sticks and ground cloves. Give the apples a little stir to incorporate the spices, and then let the apples simmer, uncovered, for 30-40 minutes, stirring the mix occasionally. At this point, there will still be some chunks of apple, but the mixture should be starting to look a lot like applesauce.
  5. Take the pot off the heat, remove the cinnamon sticks, and put the applesauce into a food processor or blender. Puree the mix until smooth. Or, if you like a chunkier applesauce, just give the apples a couple of quick pulses.

This recipe makes about 4 cups of applesauce. It will keep in the refrigerator for at least a week in an airtight container, but can also be frozen for several months.

Blueberry Oatmeal Quick Bread

Apparently I decided to take a summer blogging hiatus. So it goes. As with all things, it’s hard to get back into something you’ve gotten out of the habit of doing, so I’m going to be very unceremonious and jump back in.

I whipped this bread up Tuesday night when I was done teaching–it was at once a form of stress relief and a celebration of the fact that my kitchen is no longer a million degrees. It’s a simple quick bread dough made a bit heartier through the addition of some whole wheat flour and oats. The recipe calls for a fair amount of almond extract, which I was a little worried about since almond extract has such a strong flavor. I thought about substituting vanilla, but forged ahead with the recipe as written and was pleasantly surprised by how nice the almond flavor works with the nuttiness of batter and the flavor of the blueberries.

Blueberry Oatmeal Bread

This bread is basically a good, hearty muffin in bread form–it’s got great flavor, it’s filling, and it’s not too sweet, making it perfect for breakfast or a mid-day snack. I followed Faith’s suggestion and ate a thick slice of this bread lightly toasted and slathered with butter. Seriously delicious and an excellent start to the day with my morning tea.

Blueberry Oatmeal Quick Bread (Adapted from An Edible Mosaic)

Note: The original recipe makes two loaves and includes chopped almonds and a delicious-looking white chocolate glaze. I cut the recipe in half and left off the almonds and glaze because I didn’t have the ingredients on hand. What I’m posting here will make a single, unglazed loaf.

  • 1 c blueberries, fresh or frozen
  • 1 c all-purpose flour
  • 1 c whole wheat flour
  • 1 1/4 tsp baking powder
  • 1/4 tsp baking soda
  • 1/4 tsp salt
  • 1/2 c sugar
  • 1 egg
  • 1 c milk
  • 2 tbsp vegetable oil
  • 1/2 tsp almond extract
  • 1 cup rolled oats
  • 2 tbsp chopped, unsalted almonds, optional (I didn’t have almonds on hand but would definitely add them if I did)
  1. Preheat the oven to 350° and grease one 8×4 loaf pan.
  2. If using fresh blueberries, add a rounded teaspoon of the flour to the berries and mix to coat the berries well.
  3. Whisk together both of the flours, baking powder, baking soda, and salt in a small mixing bowl.
  4. In a medium mixing bowl, whisk together the egg and sugar. Add in the milk, oil, and almond extract and whisk until well incorporated. Slowly add the dry ingredients to the wet mixture, stirring until just combined. Fold in the oats and blueberries and then spread the batter into the prepared pan. If using, sprinkle the chopped almonds over the top of the loaf.
  5. Bake for 50-60 minutes, or until a toothpick inserted in the center comes out clean. Allow the loaf to cool on a wire rack before removing from the pan.


Cherry Raspberry Pie

It was 92° today, which set a new record high for the date in our area. Gross. I am not a huge fan of summer and this kind of heat is precisely why. The heat itself is bad enough, but living in a second-story apartment with sky lights in every room with no AC is disgusting and it makes me hateful. I’m just keeping my fingers crossed that this isn’t an indication of how the rest of the season is going to play out. Still, now is probably as good a time as any to start digging up recipes that don’t involve the oven. I think this may be a good summer to invest in a set of popsicle molds so I can make these Strawberry Lemonade Popsicles. Yum. And cold.

Anyway. We spent Memorial Day with friends, grilling out but eating inside to enjoy the air conditioning. I decided to make a pie, because pie seems like the kind of thing you’re supposed to eat on summer holidays. My original plan was to make a strawberry rhubarb pie, but when I went to the store, they were out of rhubarb. They were also out of Corona. It was a trip of frustrations. But never mind, I reevaluated my plans, grabbed a bag of sweet cherries and a pint of raspberries and decided to throw them together. The decision to throw in the raspberries was born mostly out of the fact that a single bag of cherries wouldn’t have been enough to fill a pie, and a pint of raspberries were significantly cheaper than a second bag of cherries. I had misgivings when I got home. I was worried that the fruit wasn’t flavorful enough, that I should have kept it simple and only stuck with one kind of fruit, and finally that it was all going to be a soupy mess.

Cherry Raspberry Pie

Luckily, none of my fears came to pass. You can see that part of the crust collapsed while baking, but beyond that the pie was great. For the first time in a long time, I felt like my crust was rockin’ in flavor and texture. I used the same all-butter crust recipe I’ve been using since I started this blog, but this time I added the butter in one stick at a time, which made it easier to cut into the flour and seemed to help in bringing the dough together. (I picked this trick up from my King Arthur Flour cookbook.) For the filling, I used this Sweet Cherry Pie recipe–substituting, of course, part of the cherries for about two cups of raspberries. The raspberries gave the filling a nice tartness that didn’t overwhelm the cherries, but kept the filling from being overly sweet. I’ve been wary of the idea of sour cherry pie, having some unpleasant memories of sour cherries from my childhood, but now I think I need to try it out. Also, this is the first time that I’ve made a lattice top pie (way easier than I expected) and used an egg wash on the pie lid (totally sold–the result is beautiful). We enjoyed the pie with some homemade whipped cream. It was a good day.

Basically, I wish that everything I tried my hand at turned out as well as this pie. Also, I wish we had central air. Oh well.

Cherry Raspberry Pie (Adapted from Smitten Kitchen)

Note: The above link is for the original pie filling recipe. For the crust, I also used Deb’s all butter pie crust recipe, which can be found here along with a great set of step-by-step pictorial instructions. If you’re new to making pie crust, definitely check out her post. It’s been a huge help to me, although you might want to try cutting the butter into the flour one stick at a time. I don’t have a cherry pitter, so I just pitted the cherries with my hands. But I followed the advice offered in one of Deb’s comments and pitted the cherries inside of a gallon-size ziploc bag. It helped contain the mess in a big, big way.

1 double pie crust

For Filling:

  • 2 c pitted sweet cherries
  • 2 c raspberries
  • 3/4 c sugar
  • 4 tbsp corn starch
  • 1/8 tsp salt
  • Juice from half a lemon
  • 1/4 tsp almond extract
  • 1 tbsp cold unsalted butter cut into small bits
  • 1 egg beaten with 2 tsp cold water for egg wash, optional
  1. Combine the fruit, sugar, corn starch, salt, lemon juice and almond extract in a large bowl. Stir until well combined.
  2. Roll out the dough for the bottom crust, creating a 13″ round. Line your pie plate with the rolled out crust, and trim the sides to leave a half inch overhang.
  3. Use a spoon to spread the fruit mixture into the pie shell, leaving behind most of the liquid that has developed at the bottom of the bowl. Dot the filling with the bits of cold butter.
  4. Roll out the pie lid and lay it over the pie plate (or cut strips from the dough round and create a lattice top). Trim the sides of the dough and use your fingers or a fork to seal and crimp the edges. Cut slits (for steam vents) in the pie lid and brush the pie lid with the egg wash, if using.
  5. Bake at 400° for 25 minutes. Reduce the oven temperature to 350° and bake for an additional 25-30 minutes. Allow pie to cool completely on a wire rack.

Raspberry-Topped Muffins

I like to listen to music while I’m in the kitchen and while I’m working on my laptop. Sometimes, I listen to my iTunes, but a lot of the time I listen to Pandora. I have a handful of very different stations I’ve set up, and for the past week each station has started playing Fleetwood Mac’s “Landslide” and/or “Rhiannon” several times a day. It’s getting a little eerie.

I can hear you calling to me, Stevie Nicks. And yes, I will be your best friend. Next time, feel free to just call.

(Seriously, though. Make sure you watch that video all the way through, both for Stevie Nicks’ intense performance and for the retro videography.)

Anyway, the creative non-fiction class I started earlier this month is over now. On our second-to-last day, I made some raspberry topped lemon muffins to share at our break. I found the recipe through Smitten Kitchen, and it’s one that I’ve made before to share with friends on a road trip to Louisville for a conference. It’s a basic buttermilk vanilla muffin flavored with lemon sugar (that is, lemon zest mashed into a little bit of sugar) and then topped with a couple of raspberries. It’s enough flavor to keep the muffins interesting without it being the kind of taste explosion that a lot of people don’t care for at breakfast. The muffins are really delicious, and I like this recipe precisely because it’s not your typical struesel-topped blueberry muffin. Believe me when I say that I don’t have anything against blueberry muffins–far from it. But it’s nice to have something a little different. Plus, these muffins are particularly nice for these 80° May days since they taste a whole lot like summer.

raspberry topped muffin

You’ll have to excuse this muffin for being a little . . . well . . . homely. I’m not sure why it’s raspberries are so sunken in or why it’s having trouble keeping it’s little muffin clothes on. But this is the only muffin that made it back with me from class and so it was the only muffin I was able to photograph since I forgot to take pictures before I went to class. You should just trust that even in its ugliness, it was a very delicious little muffin.

The striped muffin liner is from a whole gaggle of muffin liners my friend Abby collected for me after I blogged awhile back about running out of them. Now I have a ton, and a whole host of colors and patterns to choose from. It really does feel like dressing my baked goods up. I see many (hopefully prettier) muffins in my future . . .

Just for fun, here’s what I listened to while I was whipping these babies up:

  1. Heart, Alone
  2. Blondie, Call Me
  3. The Bangles, Walk Like an Egyptian
  4. Joan Jett, Do You Wanna Touch Me? (Oh Yeah)
  5. The Go-Go’s, We Got the Beat
  6. Madonna, Material Girl
  7. The Runaways, Rock and Roll
  8. Joan Jett, I Love Rock ‘N’ Roll
  9. Billy Idol, Rebel Yell
  10. Patty Smyth, Goodbye to You

As I write this, Edge of Seventeen just started playing. Perhaps its time for me to take a Gypsy 83-style Stevie Nicks pilgrimage?

What are you listening to this weekend as we kick-off the unofficial start of summer?

Raspberry-Topped Lemon Muffins (from Smitten Kitchen)

Note: This recipe is supposed to make 14 muffins, but I decided to just divide the batter evenly among one muffin tin to make an even dozen. I was able to top my muffins with a 1/2 pint of raspberries and still had a few leftover. But if you want to put more raspberries on the top or make more than a dozen muffins, you might need another 1/2 pint.

  • 1 c sugar, plus 2 tbsp for the lemon sugar
  • Grated lemon peel from 2 large lemons
  • 2 c all purpose flour
  • 2 1/2 tsp baking powder
  • 3/4 tsp salt
  • 1/2 c unsalted butter, softened
  • 1 large egg
  • 1 c buttermilk
  • 2 tsp vanilla
  • 1/2 – 1 pint raspberries
  1. Preheat the oven to 375° F and line 12 or 14 (see note above) muffin cups with paper liners.
  2. Mash the 2 tbsp of sugar and lemon zest together in a small bowl until well-combined. Set aside.
  3. In a medium bowl, whisk together the flour, baking powder and salt.
  4. Using an electric mixer, cream together the butter and remaining 1 c sugar. Beat in egg. Add buttermilk, then vanilla, and then the lemon sugar, mixing after each addition until combined. Beat in the flour mixture.
  5. Divide the batter among the muffin cups and top each with 3-4 raspberries. (I used three berries on the top of each muffin.) Bake 30-35 minutes until lightly browned on top and a toothpick inserted into the center comes out clean.

Lemon: Cake and Bars

snowy street

So this winter thing is still happening. I find that around this time of the year, winter just starts to feel ridiculous and a little cruel–there’s been plenty of cold and snow fun to last us for a long time, and yet (at least if you live in any kind of Northern climate) you are forced to deal with the fact that there’s still a lot of winter to go. So much so that things like “spring break” just take on a tone of mocking because you know damn well that it’s still going to be freezing and snowy and there will likely be no “spring” to speak of at all.

But there are bright spots. For instance, the Wegman’s I shop at has had a tantalizing citrus display positioned at the front of the produce department for the past month or so, which is where I picked up the Meyer lemons I used for these recipes. Meyer lemons seem to be a big deal around food blogs, what with their sweeter taste and deeper yellow color. Plus, the fact that you can maintain a Meyer lemon tree in your house is infinitely charming. But now I’m just not sure that Meyer lemons and I were meant to be great friends. It turns out that some people want lemon flavor without all the cheek-sucking tartness, and these people seem to really appreciate the Meyer lemon. I, on the other hand, found myself unsatisfied by the lack of cheek-sucking tartness and briefly considered making some lemon curd just so that I could duck into the refrigerator and eat a spoonful at random. So I am not one of those lemony-sweet people. Although, to be fair, I don’t think I can completely write Meyer lemons off until I’ve tried making a Shaker lemon pie.

meyer lemon cake

All of my feelings about lemons aside, both of these were really good recipes. The Meyer Lemon Cake is easy to throw together and would especially be a big hit for those aren’t on a quest for maximum tartness. The cake batter itself is flavored primarily with lemon extract and a bit of lemon zest, which results in a subtle and more delicate lemon flavor, although you still get more intense lemon-ocity (a term coined by one of my professors) at the top of the cake where the glaze seeps into the crumb. If you make this, you should definitely heed to recipe’s warning to use a light-metal loaf pan as the cake does, indeed, get very brown very quickly.

lemon bars

While the cake was honestly, truly good, it did not quite provide me with serious lemon-ness I desired and so I turned to Ina Garten’s lemon bars recipe as my answer. I actually ended up using two Meyer lemons for this recipe and one standard lemon that happened to be laying around in the fruit bowl. I’m not sure how the mixing of the two impacted the flavor since this is the first time I made this recipe, but I do know that I definitely ended up with something closer to tart lemon flavor I wanted. This is a great recipe that is incredibly easy to make. It takes a little longer to make than you might expect since the shortbread crust requires chilling, pre-baking, and then some cooling before you add the lemon filling and do the final bake. But none of the steps are intensive and your hands-on time is minimal, so these are easy to make while you’re in the midst of doing other things. The original recipe yielded a 9×13 pan of bars, but I cut the recipe in half. My only recommendation would be that you make these a day ahead of time–after 24 hours, the taste and texture of the filling improve and the shortbread crust seems to settle a bit so that it isn’t *quite* so crumbly. I believe we’ve got some department potlucks coming up, and I think I might have to make a pan of these again to bring along. Definitely make this recipe.

In other random news, Aidan and I are likely going to buy a new camera today. We’re not getting anything fancy, but hopefully replacing our (repeatedly dropped) five-year-old camera will yield some nicer pictures. Here’s hoping!

Meyer Lemon Cake (Originally from Saveur magazine, found via Food Gal)

Be sure to use a light metal loaf pan for this recipe, or the cake will over-brown.

  • 8 tablespoons melted butter, plus extra for greasing pan
  • 2 tbsp dry plain bread crumbs
  • 1/2 cup blanched almonds
  • 1 1/2 c flour
  • 1 tsp baking powder
  • 3/4 tsp salt
  • 1 1/3 c sugar, plus 2 tbsp for glaze
  • 2 eggs
  • 1/2 c milk
  • 2 tbsp lemon extract
  • zest and juice from 2 Meyer lemons
  1. Preheat the oven to 350 degrees. Grease an 8×4″ loaf pan with butter and then dust with the bread crumbs. Tap the sides and top of the pan to get rid of any excess bread crumbs.
  2. In a food processor, process the almonds until you have a fine meal and then set aside.
  3. In a small mixing bowl, whisk together the flour, baking powder and salt.
  4. With an electric mixer, cream together the melted butter and 1 1/3 c sugar until light. Add the eggs one at a time and beat until just incorporated. Add half of the flour mixture, then the milk, and then the remaining flour mixture, beating until incorporated after each addition. Add the lemon extract.
  5. Using a spatula, fold in the almonds and lemon zest. Pour the batter into the prepared pan and bake for about 65 minutes, or until a tester inserted in the center of the cake comes out clean.
  6. Let the cake cool on a wire rack. Meanwhile, mix together the 2 tbsp sugar and lemon juice to create the cake glaze. Use a tooth pick to poke some small holes in the top of the cake to help the glaze seep in. Using a pastry brush, brush the glaze onto the top of the cake until you’ve used all of the glaze. Allow the cake to cool in the pan until the glaze has set, then remove the cake from the pan, and allow it to cool completely on the wire rack. When it’s cool, wrap the cake in plastic wrap and let it sit for 24 hours before slicing.

Lemon Bars (adapted from Ina Garten)

The original recipe yields a 9×13 pan of bars. The recipe here reflects the changes I made when I cut the recipe in half in order to make an 8×8 pan. I also cut down a bit on the amount of sugar in the filling.

For the crust:

  • 1 stick unsalted butter
  • 1/4 c sugar
  • 1 c flour
  • Pinch of salt

For the filling:

  • 3 eggs
  • 1 1/4 c sugar
  • 1 tbsp grated lemon zest
  • 1/2 c fresh lemon juice
  • 1/2 c flour
  • Powdered sugar, for dusting
  1. Preheat the oven to 350 degrees. For the crust, use an electric mixer to cream together the butter and sugar until light. Add the flour and salt and mix until just combined. Gather the dough into a ball, and then gently press the dough into the bottom and 1/2″ up the sides of an 8×8″ pan. You may need to flour your fingers to keep the dough from sticking. Allow the crust to chill in the refrigerator for 30 minutes.
  2. Bake the crust for 15-20 minutes, until very lightly browned. Let the crust cool on a wire rack. Leave the oven on.
  3. While the crust is cooling, whisk together the eggs, sugar, lemon zest, lemon juice, and flour. Pour the filling over the crust and bake for 30-35 minutes, or until the filling is set. Allow the bars to cool completely on a wire rack. Dust with powdered sugar and cut into squares. For best results, make these bars one day ahead of time.

Cranberry Orange Scones

I’ve knocked the first item off of the Winter Break Ten list: cranberry orange scones.

Cranberry Orange Scones

I didn’t have scones for the first time until I was already in grad school and decided to spring for a cinnamon scone from ye old Starbucks. At the time, I thought it was okay. Now, I know that Starbucks scones are dry and tough and, weirdly, display no signs of actually being a baked good. I mean, how are they so uniformly shaped? How can a scone have no rise to it? Also, Starbucks, you should know that a thin layer of glaze will not salvage something that is basically a bland choking hazard. I say all of this only because I keep running across scone recipes that claim to be approximations of Starbucks scones. Why would you want to replicate that?

These scones are not dry or tasteless or tough. They were, in fact, delightfully soft, not overly sweet, and easy to make. I did everything short of the actual baking ahead of time, so that I could just throw them in the oven in the morning and enjoy warm, fresh scones with basically no effort. It’s a truly beautiful thing. To make these ahead of time, I mixed the dough up, formed the scones on a baking sheet, and then put the baking sheet in the freezer, uncovered, for about 45 minutes. After that, I transferred the scones to a freezer bag. When you’re ready to bake, the scones can go right from the freezer to the oven–no need to defrost. The benefit of freezing the scones is that you can make as many or as few at a time as you want, which is especially nice since they are best when they’ve been freshly baked.

Cranberry Orange Scones 2

I used the Meyer Lemon and Cranberry Scone recipe from Gourmet (also featured on Smitten Kitchen), substituting the zest from one medium sized orange for the lemon zest called for. Between the fresh cranberries and the orange zest, you end up with a scone that has a strong cranberry flavor against a distinct, albeit more subtle backdrop of orange. I imagine it’s something like what Mariah Carey was talking about with top notes and base notes when I watched her hawking her perfume on HSN. If these scones were a perfume, then cranberry would be the top note and orange would be the base note. Maybe. I don’t really know. (Also, why the hell was I watching Mariah Carey on HSN? Oh right–I got sucked in by the sheer absurdity of peep-toe knee-high boots. Of course.) You could probably zest two oranges for more intense orange flavor, but as is, Aidan described these as a “taste explosion.” I’m going to take that as high praise.

Cranberry Orange Scones 3

Cranberry Orange Scones

  • Zest from 1 medium orange (about 1 1/2 tbsp), finely chopped
  • 2 1/2 c all-purpose flour
  • 1/2 c granulated sugar, plus an extra 3 tbsp to sweeten the cranberries
  • 1 tbsp baking powder
  • 1/2 tsp salt
  • 6 tbsp unsalted butter, cut into small pieces
  • 1 1/4 c fresh cranberries, coarsely chopped
  • 1 egg
  • 1 egg yolk
  • 1 c heavy cream
  1. In a large bowl, whisk together the flour, 1/2 c sugar, baking powder, and salt. Using a pastry blender or your fingers, cut or rub the butter into the flour mixture until it resembles a course meal.
  2. In a small bowl, combine the chopped cranberries with the 3 tbsp of sugar and then stir the sugar-coated cranberries into the flour mixture.
  3. Beat the egg and egg yolk together, and then beat in the heavy cream. Add the egg mixture to the flour mixture and stir until just combined and dough begins to clump.
  4. Cover a baking sheet with parchment paper and lightly flour the parchment. Turn the dough out onto the pan and form it into a single mound. At this point, you can roll the dough out until it’s around 3/4″ thick and use a biscuit cutter to cut out the scones. Or you can do what I did, which was to divide the dough in half, shape it into two 3/4″ thick rounds, and then cut each round into 6 triangles. Pull the triangles apart so that there is about an inch between each scone.
  5. If you want to freeze the scones, place the pan in the freezer for 45 minutes and then move the scones to a freezer bag. These will keep in the freezer for about a week.
  6. Bake the scones in a 400 degree oven for 15 to 20 minutes until scones are golden and a toothpick inserted in the center of each scone comes out clean. Frozen scones will take 3 or 4 extra minutes to bake. Serve warm.

My Thanksgiving Contribution

For the second year in a row, two of our friends are hosting a potluck-style Thanksgiving celebration for we grad students in our program who are staying in town for break. Last year, I brought four pies as my contribution. And because I am full of surprises and excitement, I decided to do a repeat performance this year. My first step was to whip up two double pie crusts–enough for four single crust pies. As always, I used the all-butter pie crust found on Smitten Kitchen. The recipe is great, easy to throw together, and I’ve had fantastic results with it in the past. But lately, my crusts have been turning out not great. There is definitely some user-error occurring. Probably not the kind of thing that other people necessarily notice, but enough to hurt my soul. All of my pies are still uncut, but I’m interested to see how the crusts turn out this time. I think one of my winter break projects may be figuring out what’s been going wrong and trying to perfect my crust-making skills.

Anyway, first up was a crumb-topped apple pie.

apple pie

Then a pecan pie, which I made for the first time last Thanksgiving and for the second time yesterday.

pecan pie

And because pumpkin pie is traditional, I figure that I need to make at least two for a group of around 12-15 people. So I’ve got your standard, no-fuss pumpkin pie from the back of the Libby’s can . . .

pumpkin pie

. . . and for a little variety, a candied pecan-topped pumpkin pie.

candied pecan pumpkin pie

It looks a little homely, but this was a big hit last year and Aidan has already decided that this will be his one piece of Thanksgiving pie. Now all that’s left to do is (literally) whip up some whipped cream. I’m looking forward to some good food, definitely looking forward to some good beer (to take the edge off my end-of-the-semester anxieties), and already scheming ways to get out of the touch football game I hear is planned for this afternoon. Happy Thanksgiving!

Apple Crumb Pie (adapted from the Better Homes and Gardens 75th Anniversary Ed. Cookbook)

  • Single pie crust
  • 6-7 cups of apples, peeled and sliced (I used about 6 Ginger Gold apples)
  • 3/4 cup sugar
  • 3 tbsp flour
  • 1/2 tsp cinnamon
  • 1/8 tsp nutmeg
  • 1/2 c flour
  • 1/2 c brown sugar
  • 3 tbsp butter
  1. Line pie plate with single pie crust and crimp edges.
  2. Toss sliced apples together with sugar, 3 tbsp flour, cinnamon and nutmeg until coated. Spread apple mixture evenly in pie shell.
  3. Mix 1/2 cup flour and brown sugar together. Use a pastry blender to cut in butter until the mixture looks like coarse crumbs. Sprinkle brown sugar mixture on top of the apples.
  4. Cover edges of the pie with tin foil. Bake in a 375 degree oven for 40 minutes. Remove foil and bake 20 minutes more until bubbly.

Pecan Pie (adapted from the Better Homes and Gardens 75th Anniversary Ed. Cookbook)

  • 1 single pie crust
  • 3 beaten eggs
  • 1 c corn syrup
  • 2/3 c sugar
  • 1/3 butter, melted
  • 1 tsp vanilla
  • 1 1/2 c shelled pecans
  1. Line pie plate with single pie crust and crimp edges.
  2. Stir together eggs, corn syrup, sugar, butter, and vanilla until well-combined. Stir in pecans. Spread pecan mixture into pie shell.
  3. Cover edges of the pie with tin foil. Bake in a 350 degree oven for 25 minutes. Remove foil and then bake for 20-25 minutes longer until a knife inserted into the center comes out clean.

Pumpkin Pie (an unintentional mash up of the Libby’s pumpkin pie recipe and the pumpkin pie recipe in the Better Homes and Gardens Cookbook)

  • 1 single pie crust
  • 1 15 oz can of pumpkin
  • 2 eggs
  • 3/4 cup sugar
  • 1 tsp cinnamon
  • 1/2 tsp ginger
  • 1/4 tsp cloves
  • 1 12 oz can of evaporated milk
  1. Line pie plate with single crust and crimp edges.
  2. Whisk together pumpkin and eggs until well-combined. Stir in sugar, cinnamon, ginger, and cloves. Slowly add evaporated milk to pumpkin mixture. Pour pumpkin mixture into pie shell.
  3. Cover edges of pie with tin foil. Bake in a 375 degree oven for 25 minutes. Remove foil and bake for 25 minutes more until a knife inserted in the center comes out clean.

Candied Pecan Pumpkin Pie (adapted from the Better Homes and Gardens 75th Anniversary Ed. Cookbook)

  • 1 single pie crust.
  • 2 beaten eggs
  • 1 15 oz can of pumpkin
  • 1/4 c milk
  • 3/4 cup sugar
  • 1 tbsp flour
  • 1/2 tsp vanilla
  • 1/4 tsp salt
  • 1/4 tsp cinnamon
  • 1/4 tsp nutmeg
  • 1/4 tsp allspice
  • 1/2 c brown sugar
  • 1/2 c chopped pecans
  • 2 tbsp melted butter
  1. Line pie plate with single pie crust and crimp edges.
  2. Stir together eggs, pumpkin, and milk until well-combined. Stir in sugar, flour, vanilla, salt, cinnamon, nutmeg, and allspice. Pour pumpkin mixture into pie shell.
  3. Cover edges of pie with tin foil. Bake in a 375 degree oven for 25 minutes. Remove foil. Stir together brown sugar, pecans, and butter. Sprinkle mixture over top of pie. Bake for 20-25 minutes more until a knife inserted in the center comes out clean.

Blueberry Peach Plan B

I am officially back in school. Yesterday, I finished my first day of classes which, this semester, includes taking two seminars and teaching two sections of first year writing. I think both are off to a pretty good start. I’m also trying to settle into a semester schedule that leaves enough time in between reading and grading for things I really like but have been neglecting lately like cooking and baking and knitting and this blog. One step at a time . . .

I was feeling a little sad that summer was ending until we got hit this week with temps in the 90s and Aidan and I found ourselves hiding out in our air-conditioned bedroom like it was a fall out shelter in a nuclear crisis. Good riddance. I didn’t like that heat in July, and I like it even less now that I have to walk to campus in the morning and teach in sweaty clothes. (Which, by the way, is not a look that impresses the students.) Luckily, a cold front moved in over night and now we’re sitting pretty in the mid-60s with some storms coming our way for the rest of the weekend. And while its supposed to get sunny and warm again during the week, it’s not supposed to climb anywhere near the sweltering temps we had this week. I have my fingers crossed that this was the last burst of heat we’ll get this year, because I have bread and mac ‘n cheese and soup on the brain, and this weather has really been interfering with my desires.

Anyway, before the semester officially started, I spent two weeks in various orientations and beginning-of-the-school-year events, which included at one point a department potluck. I’m apparently becoming a little bit of a church lady (without so much of the church part) because potlucks make me feel a little competitive, and after thinking a lot about it I decided to make a blueberry peach slab pie. It seemed appropriate since, as Aidan pointed out, the orange and blue of the fruit mirrored SU’s school colors. Lord knows I’ve got school spirit in spades. The idea of the slab pie is pretty basic–it’s just a pie made on a baking sheet instead of a pie pan so that it can be cut into squares and serve more people, making it potluck perfect. Based on some tips I found online, I went ahead and made 1 1/5 of a regular pie crust recipe and the same amount of filling I would make for a regular pie. This is what I learned:

  1. That trying to roll pie dough into a long rectangle sounds a lot easier than it actually is in practice.
  2. That 150% of a standard pie dough recipe is, in fact, no where close to enough dough to make a slab pie in 15×9 baking sheet. Doubling the recipe would have been better.
  3. Admitting defeat at 1:00a when you’re filling is already made and you know you will have no other time to bake anything before the potluck is not an option.
  4. If you throw what pie crust you do have down onto the baking sheet, throw the filling in the middle, make a half-hearted attempt to do something with the edges, and call it a rustic tart, people will not know your dessert was really a screw up. (Unless you tell them, which I did.)
  5. Brushing the edges of your crust with milk during the last ten minutes of baking really does produce a beautifully browned crust.
  6. Peach and blueberry makes for a great filling combination.
  7. Basic comfort foods really make people happy.

Rustic Tart

I forgot to take a picture of it until we were headed out the door, so this is the only shot of the “rustic tart” we got. But its a good thing we stopped to snap a picture when we did because all we brought home was an empty plate. Which is to say that it was well received, even though it was ugly. I suppose the fact that it tasted good is what really matters. Oh, and the fact that I walked away from the potluck with my pride intact.

Blueberry Peach Plan-B “Rustic Tart”

This ended up being about a 12×8 oval–maybe even a bit bigger. A recipe for a double pie crust would be sufficient for replicating what I made here, since I ended up throwing away all of the extra dough I had made. I’ve been using this all-butter pie crust recipe from Smitten Kitchen, and have  been really pleased with the results. When I was making this, I transferred the dough directly to the pan by gently folding it over itself, but you might consider rolling the dough out on parchment paper so that it’s easier to transfer on and off the pan.

For the filling:

  • 2/3 c sugar
  • 2 tbsp quick cooking tapioca
  • 1/4 tsp cinnamon
  • 1/4 tsp nutmeg
  • 5 cups of sliced peaches
  • 1 pint of blueberries

In a large bowl, stir together the sugar, tapioca, cinnamon, and nutmeg. Add the fruit, stir together until the fruit is coated and then let the mixture stand for about 20 minutes, stirring occasionally.

Roll the pie crust out into a large oval about 2″ wider than you want the final tart to be. Transfer to the baking sheet. Pour the filling onto the crust and spread evenly, leaving two inches of crust around the edges without any filling on it. Fold the edge of the crust over and onto itself in some kind of semi-decorative fashion. (This is where calling it “rustic” comes in handy. It makes the ugly seem intentional.)

Bake at 350 degrees for 35 minutes. Lightly brush the crust with milk and then return to the oven for another ten minutes. Serve to people who will be impressed by the fact that you didn’t buy a pre-made pie crust.