Recent Knits

Just a short post today to share some of the knitting projects I’ve finished (sort of) recently. It’s the last week of classes for me, and I feel totally drained but I am determined to keep posting!

The first project is this Constellate Hat, which I started when my friend Abby asked if I’d be interested in doing a knit-along with her. I actually don’t knit a ton of hats, mostly because I find them kind of boring, but the stitch pattern on this pattern was really intriguing to me. And I’m glad she suggested making this pattern because:

  1. It was, indeed, an interesting stitch pattern to learn
  2. The pattern itself was written in an unusual style that was sort of frustrating at times but also kind of fascinating.
  3. I got to use a yarn that I love but has been sitting in my stash neglected for a very long time.
  4. I had been feeling very bored with knitting and so it was refreshing to take up a kind of impulsive project that was outside of the range of what I had been working on.
  5. It was fun and motivating to work on something with someone else.
  6. I ended up with a great hat.

I have not actually worn this hat because it is spring, and I am stubbornly refusing to wear anything other than a light jacket even though it is literally snowing outside as I write this. But I am excited to pull it back out in the fall.

The second project was an easy baby sweater for our new niece, Genevieve. I’ve made this pattern, The Playdate cardigan, a couple of times before—once for Jude and once for my nephew, Forrest. It’s a nice, easy way to showcase a great skein of fingering weight yarn, which was precisely what I wanted to do with this particular project. I’d had this skein of MadTosh Twist Light in my stash for years but couldn’t figure out exactly what I wanted to do with it. I think I originally bought it for socks, but it didn’t feel like the way I wanted to showcase the color. I think this baby sweater is a much better way to show off the fun little speckles of color. When it was finished, I went a little bananas and bought three different colors of buttons so I could really belabor the choice, but I think it was worth it in the end. The purple buttons really bring it together.

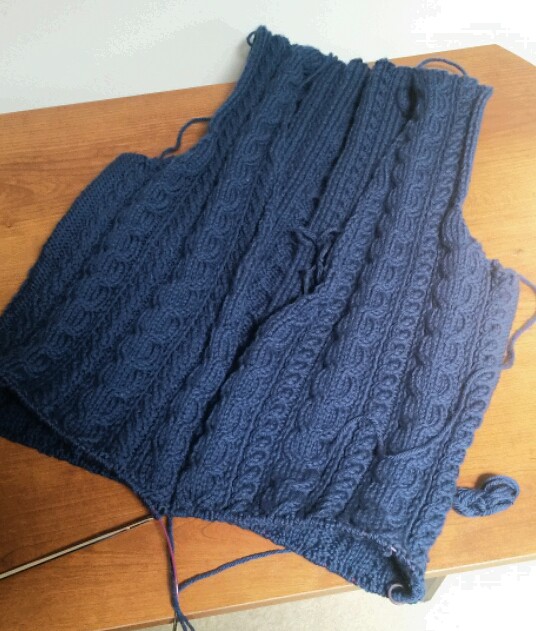
Right now, I’m working on the second sleeve of a Glenmore Aran for myself that isn’t worth photographing at the moment because I’m using black yarn and so it just looks like a mass of black. But I imagine that I’ll finish that up just in time to pack it away until October. Unless it keeps snowing.

Project Details:

Hat

Pattern – Constellate Hat by Hunter Hammerson

Yarn – Manos del Uruguay Fino in Peacock Plume

Size – This is a flexible pattern written for a range of sizes and gauges. My gauge was 7 sts/inch and I cast on 136 stitches.

Baby Sweater

Pattern – Playdate Cardigan by Tin Can Knits

Yarn – MadTosh Twist Light in Cosmic Silver

Size – 6-12 months

Divided Baskets

I’m finally getting around to blogging one of my last pre-Jude projects: two Divided Baskets (pattern by Noodlehead). I made two of these baskets—one for Jude’s room and one to keep on the first floor in our living room. We use both baskets to hold diapers, burp cloths, and things like diaper rash cream. I love these baskets. They are cute and practical and were pretty fun to sew.

Noodlehead Divided Baskets

The one for his room is made using the same space-themed fabric I used when I made some simple valences for the windows. All of the other fabrics are just quilting cottons that I picked up from Joann’s. I used some white cotton webbing for the basket handles. The pattern has an option where you add some accent fabric to the handles, but I didn’t feel like bothering.

IMG_0650

The baskets are really easy to put together. You’re really just sewing a bunch of straight lines and the instructions are clear and thorough. I was also surprised by how quickly the sewing went. For some reason, I was thinking that constructing the baskets would be a fairly involved process, but it’s not at all.

IMG_0677

Hands down, the most tedious part of making these baskets (and I won’t lie—it is definitely tedious) is cutting out and applying all of the interfacing. Obviously, I made this worse for myself by making two at once so I had to deal with twice the interfacing. But I also followed the recommendation to use two kinds of interfacing, both the heavy craft interfacing and the fusible fleece, to get a more structured basket. The process of applying all that interfacing felt endless, but it was totally worth it. The baskets are structured enough to hold all of the things we need without collapsing, and we’ve been using them every day for nearly four months without any issues.

IMG_0678

These seem like a really popular handmade baby shower gift, and I can see why. But I’m also thinking about making one of these baskets for my sewing room to organize pattern pieces and notions for the projects I have on the go. There are so many potential uses for these baskets, I’m glad I bought this pattern—I’ll definitely be sewing it again.

Madigan, Revised

When we last we spoke of my Madigan pullover, I was thoroughly disappointed with how the sweater had turned out. I just didn’t like the way that it looked on me, primarily because I wasn’t a fan of the cap sleeves.

Madigan

As I kept looking at the photos of the sweater, I realized there were other, less obvious aspects of the sweater that I didn’t like. I hated the welted detail at the hip and it seemed a touch too long through the body. Add in the cap sleeves, which required a longer-sleeved tee underneath, and the one feature of the pullover that I really liked–the welted cowl neck–was getting kind of lost in the visual shuffle.

Madigan Pullover

When I initially finished this sweater, I was ready to just rip the whole thing out, but some encouraging blog comments got me to slow down and think about how I could save it. My friend Abby suggested 3/4 sleeves, which I decided to go ahead and add. I also ripped out the welted hem and replaced it with 2″ of 2×2 ribbing, shortening the body of the sweater by ~1″. The ribbing also eliminates the weird rippling I was previously getting around the bottom of the welted hem.

img_7443_medium2

The end result is more wearable because it doesn’t require any creative layering. But even more than that, the revised sweater is a more streamlined look that puts all of the focus on the cowl neck–I’ve basically eliminated anything that was previously a visual distraction from the cowl. People talk a lot about the importance of proportions, which I always find difficult to understand, but I think the new version of the sweater works because of the issue of proportions. The length of the sleeves and the slightly shorter length just look better on my body.

madigan before and after

Anyway, I’m really happy with how this sweater ultimately turned out and even happier that I didn’t just ditch the whole project. The changes were really easy to make since the sweater is knit top-down in the round. I think it took me four or five evenings to add the sleeves and the ribbing. That’s not very much time at all to take a project from being a loser to being one of the best pullovers I’ve made!

Grandpa Cardigan

Finally! Finished pics of the Grandpa cardigan. I started knitting this in August as part of a knit-along with my friend, Abby. I’m pretty worn out on lightweight, fitted cardigans, but I’m really liking heavier-weight cardigans that almost more like jackets. I made the Girl Friday cardigan a few years ago, which is pretty similar in style, and I’ve been wearing it a lot over the last year. So I think the Grandpa cardigan will fit into my closet nicely. I used Cascade 220 in Atlantic. The pattern calls for a DK weight yarn, but I like the way this knit up in a worsted weight. The fabric isn’t too dense and the cables have great definition.

Before I get into detailing all of my fit modifications, I just want to say that this is a really excellent pattern. This sweater can be a bit challenging–there are a lot of different details to manage at once–but I think the pattern in written in such a way that makes tackling everything that you need to do as clear and as manageable as possible. As long as you’re keeping track of the numbers and charts that are relevant to your size, I think it’s pretty easy to stay on top of where you need to be.

I think this pattern also has some really great design details. I like that the cable pattern is specific to each size and that the ribbing on the collar, sleeves, and hem is all finished with a tubular bind-off. I don’t think I’ve used a tubular bind-off before, and even though it’s a bit to work around the length of the collar, the result is really nice. (I found this tutorial from Interweave especially helpful when I was working the bind off.) I’ve also previously tried a pattern with a seamless, set-in sleeve like this pattern uses and ended up with a sleeve that looked really weird and baggy. I’ve seen other people get similar results with this construction method so I was a bit hesitant, but I think the sleeves on this cardigan look really good and have yet to see another project where someone had something funky going on with their sleeves.

My upper torso, full bust, and hip measurements all fall into three different sizes, which I usually manage with bust darts and a lot of waist shaping using methods that wouldn’t work with this particular pattern. To work around this, I started with the 42-44” size for the upper torso, and then added extra stitches for the bust by following the neckline instructions for the largest size. This made the sweater ~46” around the fullest part of my bust. Then I added more room at the hip by working 4 extra sets of increases at the waist shaping.

The armscye seemed a bit shallow to me, so I added 1/2” before starting the armhole shaping. I made the sleeves 2” shorter than the pattern called for and added a couple of extra buttons. After I finished the sweater at the end of the September, I realized it was looking a bit short and hitting me at kind of a weird place. So I ripped out the collar and button band and ripped out the ribbing at the bottom so that I could add another 2” of length in the body. I’m much happier with the longer length—I think it works well with the style of the sweater.

Adding the extra length used up the extra ball of “just in case” yarn I ordered for this project. If I hadn’t used it to lengthen the body, I probably would have gone back and made the button band significantly wider. The shawl collar is a bit shallow and sometimes wants to flip up, but I could also use a little bit of extra width on the body. The cables pull in enough that make this feel pretty snug even though it’s knit to the measurements I typically knit to. The pattern recommends 1-2” of ease, which I ignored because I typically knit sweaters with zero ease or just a bit of negative ease, but I wish I had added more ease through the body to counteract the behavior of the cables. If I were to knit this again, I’d also lower the back neckline by about an inch.

Making this pattern was the most fun I’ve had knitting in quite awhile. I highly recommend it, and I’m looking forward to trying more Joji Locatelli patterns in the future. There’s really a glut of knitting patterns available right now, but I Joji is one of the designers that always stands out to me (Ysolda Teague and all of the regular contributors to Brooklyn Tweed tend to be my other favorites). Not everything she designs is something I would wear, but I really appreciate the originality of her work and the fact that she’s coming up with more challenging designs that make use of a variety of construction methods and techniques. Maybe I’ll have to try Even Flow next?

Basic Socks and a Wee Liesl

After I finished my Grandpa cardigan (which I still haven’t photographed yet, but which has been blocked and now has buttons and has been on my back every couple of days since then), I was feeling the need for some quick and mindless knitting. I started by finishing up two small projects that I’d had laying around for awhile. The first finished project was another pair of socks for Aidan. There isn’t much to say about these since they are pretty much the same as every other pair of socks I make for him—top down in 2×2 rib worked over 72 sts on US size 1 needles. This yarn is Regia 4 Ply Terra in the Anthracite colorway. I think this is something like the 12th or 13th pair of socks I’ve made for Aidan over the last seven years, and only one pair has bit the dust so far.

Anthracite Socks

The second finished project was a little cardigan that I started making at some point last spring when I was in the middle of a knitting funk. I had just finished up my Blank Canvas sweater, and I didn’t have a project that I felt inspired to work on but my hands felt restless. When I saw the pattern pop up on Ravelry, I thought: that purple yarn that I never know what to do with would be perfect for this. And so , even though I didn’t have a recipient in mind and didn’t even know anyone with an infant- to toddler-sized girl, I cast on. I managed to get about 3/4 of the way through the body of the sweater before I finally thought, “What the hell am I going to do with this sweater?”, shoved it in the back of my knitting bin, forgot about it, and settled back into my knitting funk.

Wee Liesl Cardigan

The pattern is Ysolda Teague’s Wee Liesl and the yarn is Serenity Sock in violet. The pink buttons were the only appropriate button choice I had on hand, so I decided to just embrace the super-princess look. I knit the 18-24 months size to use up the maximum amount of yarn. This was a fun and frivolous knitting project and the result is pretty cute. If I were a toddler, I would probably style this cardigan with rainbow striped leggings and heart-shaped sunglasses. In the time between me setting this cardigan aside and then finally finishing it, a friend actually had a little girl, and so this cardigan will now be going to my new little friend Yusra (who was also the recipient of the Pomander cardigan). She probably won’t fit into it for another year, but I’m sure she will look very cute in it when she does.

After finishing up the socks and cardigan, I was on a roll and managed to knit up a cowl and two hats in the span of a week. Now I’m in the middle of a fingering-weight pullover that I’m knitting. For a mostly sweater knit almost entirely in stockinette at about 8 stitches per inch, it’s going surprisingly fast. I’m still trying to plug along with sewing, but honestly, I have a lot on my plate right now and knitting is my comfort craft. So if I post a lot more about knitting than I do about sewing, it’s just because my hands and my brain are going with what they know best!

Pomander Cardigan

Right now, I have several knitting projects in the works at once, which is unusual for me since I generally prefer to focus on one thing at a time. It also means that I’ve been doing a lot of knitting but haven’t managed to finish much. My most recent finish is this little baby sweater I made for a friend in my doctoral program last month.

Pomander Cardigan

This is the Pomander Cardigan pattern, which I knit up in Valley Yarns Huntington in the Sea Gull colorway (you can find all the knitterly details on Ravelry). This is a light-weight circular-yoke cardigan with a cabled yoke and an i-cord finish at the neckline, and the pattern comes in sizes 3 mos – 18 mos.  You work the body of the sweater from the bottom up, using a provisional cast-on for the sleeves at the start of the yoke shaping. Then, once the body is complete, you undo the provisional cast-on and knit the sleeves from the top-down. I’ve never made a sweater with this construction method before, so it was an interesting knit.

Pomander Cardigan yoke closeup

Overall, I really like this pattern—I’m not a huge fan of the wide button band, but I love the way the cable detail works at the neckline. I made the 9 mos size and am crossing my fingers that it will be just the right size to see a late-summer baby through most of Central New York’s lengthy sweater season.  I didn’t make any significant changes aside from working one-row buttonholes instead of the yarn-over buttonholes called for in the pattern. I seriously dislike yarn-over buttonholes. Yes, they are easy to make. But I think they can also look kind of sloppy and can be difficult to locate when you’re actually trying to button a sweater up—especially in a fingering-weight baby sweater.

Pomander Cardigan back view

All in all, it was a fun little knit and a well-received gift. I know some people balk at the idea of knitting sweaters for babies and toddlers since they grow so quickly, ooze various kinds of bodily fluids, and are generally sort of messy. But in my experience, a simple sweater in an easy-care yarn gets a lot of love, especially given how quick they are to make.

Regia 4 Ply Terra in Silver and Denim

Sock in Regia 4 Ply Terra Anthracite

As for my other in-progress knitting projects, my Grandpa cardigan is still on hold while I do the finishing for my Apres Surf Hoodie (and there is basically a metric crap ton of finishing for this pattern). Thanks to all of that tedious finishing work in front of my and a particularly stressful week, I ended up impulse buying 3 balls of discontinued Regia 4-Ply at 50% from Webs. I’ve already cast on for a simple pair of socks for Aidan in the Anthracite colorway. I’m glad to have some mindless knitting at the ready, and I’m also seriously doubting that I will manage to finish the Apres Surf Hoodie while it’s still seasonally appropriate to wear. So it goes. Knitting adheres to it’s own timetable!

Sewing for Knitting, 3rd Edition: Pleated Tote Bag

I’ve been doing some more meta-crafting, as Aidan calls it, and sewed up a larger knitting project bag. It has taken me ten years to appreciate the purpose of a project bag. Sure, it keeps all of the stuff that you need for your project together, but more importantly–and this is the part I wish I had realized sooner–it protects your knitting from the constant onslaught of cat hair that is an inevitable part of life in a multi-feline home.

Pleated Tote Knitting Project Bag

This is the Pleated Tote Bag from The Long Thread, which is a free tutorial with very clear and easy to follow instructions. It’s a fully lined tote bag that is about 17″ wide at the bottom, 13″ wide at the top, and about 15″ tall. It’s the perfect size to hold a sweater-sized knitting project.

Close up the pleat detail on pleated tote bag

The outer and lining fabrics are both from JoAnn’s. I walked into the store without a clear sense of what I was looking for, but I must have been feeling inspired by the ’70s, because this is the only fabric that jumped out at me. When the woman at the cutting table asked me what I was making and when I told her I was planning to make a knitting bag, she said: “Well, it’s not your grandma’s knitting bag, is it?” But I suppose it depends on how tacky your grandma is.

Whatever. It is bright, it makes me happy, and it’s very unlikely that I will misplace my knitting.

Pleated Tote Lining close-up

I followed the tutorial instructions closely, with the exception of the top-stitching. The tutorial suggests two rows of top-stitching at the top and on the handles, but I was feeling lazy and only did one. (Although, I’m pretty sure that the tutorial samples also show only a single row of top-stitiching.) The outer fabric is all stabilized with fusible fleece, and the thickness of the fleece made folding the pleats evenly a bit tricky. The only other challenging part was top stitching the handles–I found that one of the handles wanted to twist while it was being sewn shut. I’m wondering if maybe I pressed the troublesome handle a little off grain and maybe that’s what caused the problem? Still, everything turned out fine in the end.

Grandpa Cardigan progress shot

This pleated tote is currently holding my in-progress Grandpa Cardigan, which I am knitting along with a friend. I’m using Cascade 220 in Atlantic, which is a much more attractive color than it appears to be in the above progress shot (kind of a light navy blue). Grandpa is a bit of a tricky pattern, but I’m enjoying the challenge and have to keep tearing myself away from it so that I can do, you know, actual work. I also told myself that I was going to put it aside once I finished the neckline shaping so that I could finish up my Apres Surf Hoodie, but I am weak-willed and just ended up knitting my through another ball of yarn. I can’t wait until this one is finished–it’s going to see a lot of wear this fall and winter.

There are more knitterly details about my sweater progress on Ravelry if that’s the kind of thing you’re interested in.

Sewing for Knitting, Round Two: Small Project Bag

I haven’t had a lot of sewing motivation lately, which I blame on summer. I’ve seen a few other bloggers explain that their motivation to sew or blog has slowed over summer because they want to take advantage of the nice weather and romp around outside. I need to be very clear: I am not one of these bloggers. I am like a shade plant that wilts and burns and shrivels up in direct sunlight and extreme heat. I am truly a winter soul and summer weather has a way of zapping me of all of my creative energy.

Temporary sewing space

Anyway. Aidan is spending the next six weeks at a ridiculously long work-related training program and while I get to visit him on the weekends, his absence has left me with a lot of empty time in the evenings to sit on my hands and feel sorry for myself. Rather than indulge that self-destructive urge, I rearranged our dining nook into a temporary sewing space so that I can sew while the TV keeps me company. It might not be enough to keep me sewing on the really hot and humid days, but it’s enough to get me excited about sewing again.

Pac Man Knitting Project Bag

To break in my new space, I spent an evening making a small, sock-sized knitting project bag using various leftover scraps of fabric. The Pac-Man inspired fabric is leftover from a pair of pajama shorts I made for Aidan to take on his trip. I ordered it from Hart’s and but it says they are out of stock now.

Project Bag Lining

I used this free tutorial from Very Shannon for a basic flat-bottom drawstring bag that is lined in a way that effectively makes the bag reversible. It was really easy to make. I read through the instructions once or twice before I started, and then was basically able to construct the entire bag without needing to refer back to the tutorial.

Project bag drawstring casing close up

The tutorial has you construct a casing for the drawstring that seems a little non-traditional that basically leaves a 2” opening at the top of the casing for the end of the drawstring. I’d prefer the look of a more traditional drawstring casing, and if I were making a project bag for someone else, I’d probably go to the trouble to make one. But as is, the drawstring is perfectly functional and eliminated all of the more tedious parts of making a casing so it really was very simple and very quick to make.

Knitting Project Bag

All in all, this was a very satisfying little project. And now, back to making some clothes!

Beach Robes

I’ve been sewing for small people! I made up some beach robes for our nephew and our godson–both boys are 3, and I’m sure they’ll both be eager to do a lot of swimming this summer.

Beach Robes via sweetalchemy.wordpress.com

I’m not sure what possessed me to take on this project, other than that these are pretty cute and they seem useful. In my experience, little kids will play in the water until they are shivering and their lips are blue, but that doesn’t mean you can get them to sit still wrapped up in a towel long enough to really warm up. Plus, a lot of parents have made these and like them so that seems like a good sign. After planning out this project and gathering all of my supplies, I actually started to get kind of intimidated by the idea of sewing these robes. I was a little nervous about sewing terrycloth and even more nervous about all of the bias binding these robes require. For whatever reason, I was also imagining that it would take me weeks of work to get these done. But I was pleasantly surprised to find that they were not difficult and that they come together a lot more quickly than I had anticipated.

Beach Robe via sweetalchemy.wordpress.com

This is the Beach Robe pattern from MADE, which is a PDF pattern. It comes in three different sizes that seem like they’ll fit most kids in the infant-to-kindergartener crowd and has several different design options: short or long sleeves, lined or unlined hood, and full or partial ties. The robe itself is just a handful of pattern pieces that are very simple to sew together, and then the whole shebang is bound in bias tape for a punchy little contrast finish. The purple robe is the Large (4T+) size and is cut from two 30×54” towels from Kohl’s (they were called BIG towels—I think it’s a store brand?). The red robe is the Medium (18mos-3T) size and is cut from two 30×54” quick dry towels from Target. For each robe, I used 3 packages of pre-made bias tape to bind the edges of both robes and used 1/2 yard of fabric from the nursery print section of JoAnn’s for the hood linings.

Beach Robe Hood Close Up via sweetalchemy.wordpress.com

Like I said–these are pretty simple to sew and the pattern has very clear instructions. But here are a couple of additional tips for tackling this project:

  • If you use two towels lay them both out at once and map out the layout for all your pattern pieces before you start cutting. This will reduce the likelihood that you A) screw up the nap from one towel to the next and B) forget to cut out the hood piece and find yourself having to piece the hood together from scraps. Not that I have firsthand experience, or anything…
  • Use a heavyweight needle. I used a 110/18 needle, which I worried would be overkill, but it made it easy to power through the bulky seams.
  • Also use a longer stitch length. I set my stitch length to 3mm.

Beach Robe via sweetalchemy.wordpress.com

  • Unless you are a Level 4 Bias Binding Wizard, consider attaching the binding in two steps, as outlined in this tutorial. The pattern tells you to just sandwich the fabric edge between the binding folds and sew it on in one pass, but a lot of people who have made this commented on the difficulty of getting the binding evenly attached using this method. Attaching it in two steps requires a second pass through the sewing machine, but it’s a trade off for the various heartaches and anxieties  and messiness that can result from trying to cut a corner. Given that each one of these robes required about 8 yards of binding, I say go with the method that’s more of a sure bet.
  • Accept that the ends of the ties are going to look a little f’d. That’s a tight corner to get your binding around. Remember that it is for a small child to wear to the pool/beach and that no one really cares. (I’m mostly consoling myself with this tip.)

Beach robe hood close up via sweetalchemy.wordpress.com

  • Attach the sleeves flat. Dana included an update about using this method in this blog post. As drafted, the sleeves fit into the armscye nicely if you set them in as described in the pattern. However, they are tiny child’s armholes that can be a bit of a struggle to sew around depending on the size of your sewing machine’s free arm.
  • Consider top-stitching the seam allowances to one side after you finish them. You might not be able to top-stitch the sleeve seams if you do the long-sleeved version, but it’s worth doing where you can. It helps to manage the bulk of the seams. Plus, if you don’t have a serger to finish the seams, it adds another level of anti-fray protection on top of zigzagging the seam allowances and helps give the inside a clean finish.

My finished seams (zigzagged and top-stitched). Looking pretty clean inside!

I had a lot of fun sewing these. My stitching is far from perfect but these turned out so cute, I don’t care. When Aidan asked our godson how he felt about his robe, he shrugged his shoulders and said, “It looks all right.” I’m counting that as a win.

Beach Robes via sweetalchemy.wordpress.com


Long-Term Wearability Report

I haven’t been participating in Me-Made-May (my limited handmade wardrobe is as much a disincentive as the thought of taking pictures of myself everyday), but I have been following the various Me-Made-May hashtags on Instagram and was inspired to reflect a bit on the garments I’ve made so far this year. The enthusiasm that comes with having finished a new piece of clothing doesn’t always last beyond the first wear and blog photos can’t always capture how well a piece fits or how well it wears once you get into the business of daily life. So here are some brief thoughts about how well the things I’ve made in the first part of 2014 are working out for me. And since I was deep in grading mode when I started drafting this post, I’ve even given each item a score for overall wearability out of 5 points. Teachers know how to make everything fun!

Knitting:

Squared Cardigan – 3/5: I like this cardigan but it’s low neckline limits what I can wear with it. It looks best closed and I like it with a collared shirt, but that gives me few styling options so I only wear it every once in awhile.

Audrey Cardigan – 2/5: I’ve worn this a few times, but I don’t feel good wearing it. It’s just a smidge too big—not enough to make it unwearable, but big enough that I feel a little dowdy in it. I need to make a decision about what to do with this one. I either want to rip it out and make something new or try some sweater surgery to bring it in at the sides. Right now, I’m leaning towards the latter.


Blank Canvas – 4/5: I love the way this pullover fits, and I like having a basic pullover sweater in my closet. It’s very comfortable and easy to wear, and I would totally knit this pattern again. My only complaint about this particular sweater is the color. I think I like this shade of blue more in the world than I like it on me.


Sewing:

Kwik Sew T-Shirt – 1/5: I only wear this around the house, and even then I only wear it when all of my other lounge-type shirts are dirty. It has lots of problems ranging from a neckline that doesn’t lay flat to really crappy hems and I just don’t love the pattern. Plus, I hate the fabric. The silver lining with this project is that it’s made me a lot more discerning in my knit fabric choices–I’ve had much better luck since I started avoiding polyester-blend jerseys.

Gray M6844 Cardigan – 4/5: The sleeves on this were a bit too long and the hems were rather inelastic. I ended up cutting off the existing sleeve hem, turning the sleeves up by 5/8” and re-hemming the sleeves using a narrow zig-zag. This quick alteration has significantly improved the wearability of this cardigan since it feels a little less sloppy with the shortened sleeve length and since I can easily push the sleeves up (something I do a lot with my clothes). Overall, this is very comfortable and very easy to wear. The polyester content in the fabric makes it warmer than I expected from such a light-weight knit and the fabric is starting to pill, but I really like this style and will definitely be making this pattern again in the fall.


Day-to-Night Drape Top – 4/5: I ended up not liking the hem bands I used on this shirt, and I still think that the elastic across the back neckline is too short and the shoulders too narrow, so I feel a bit self-conscious about how the shirt lays across my shoulders.  But I still wear it quite a bit since I love the color of the fabric. I also like that this is basically just a T-shirt, but makes me feel more put-together.


Underwear – 5/5: I absolutely love these. I’d wear my handmade underwear everyday if I had enough to get me through from laundry day to laundry day, and I have plans for a few more pairs to help me reach that goal. I’m especially pleased with the way that the enclosed gusset is working out. Overall, I prefer the pairs that have some spandex content in them, since they have better recovery throughout the day. The ones without spandex are comfortable, but they do tend to stretch out as the day goes on.


Gray Birgitte Long-Sleeve Tee – 4.5/5: I love this shirt so much I have very little to say about it. I do wish that I had slimmed the sleeves a bit, but otherwise it’s nearly perfect. I’ve already finished a short-sleeve version of this pattern and have another in progress.


Black and White Chevron camisole – 3.5/5: I’m struck by how comfortable this is, probably because every other camisole I’ve owned in my life has felt a bit like a sausage casing. The next time around, I’ll use the plush side of the fold-over elastic since I’m finding the shiny side a little itchy. This is another piece that is limited by the fact that I have very little to wear with it. I’ll probably end up making a few more of these in more basic colors to wear with cardigans.


So that’s the run-down so far. All in all, I’m pleased with the things that I’ve managed to make so far this year, and I end up wearing something that I’ve made almost everyday. It’s a good feeling and a great motivator to keep sewing.

Outside of challenges like Me-Made-May, how often do you wear your handmade garments?