Birgitte Basic Tee

I’ve been looking for a good, basic T-shirt pattern since I finished my version of Kwik Sew 3766 earlier this year. The Kwik Sew pattern is perfectly fine, but I wasn’t thrilled with the way that it fit me or with some of it’s design details. There are a couple of basic tee patterns from independent pattern companies like the Sewaholic Renfrew and the Doe and Deer Plantain that are pretty beloved by sewing bloggers, but they don’t come in size Busty Fat Lady. After the success of my Day to Night Drape Top, I decided to try the MariaDenmark’s Birgitte Basic Tee pattern, assuming that the sizing, drafting, and fit would be similar.

I’m happy to report that the Birgitte Tee worked out just as well as the Day to Night Drape Top, and I’m totally sold on this pattern as a really solid, well-drafted basic. I love that it’s drafted to fit up to a 4x (a 49.5″ bust, according to the MariaDenmark size chart), and I love that it’s designed for stretchier (rather than stable) knits. And as a connoisseur of deep necklines, the depth and width of this scoop neck are perfectly suited to my tastes. The pattern makes a great basic t-shirt on it’s own, with the option of a scoop or V-neck and a choice of full, short, or 3/4 sleeves. But it’s also a perfect canvas for all kinds of pattern hacks—I’ve already done one pattern hack that I’ll write more about later this week. The instructions are straight-forward and would be easy to follow even if you haven’t made a t-shirt before. It’s a pdf pattern so you have to print out the pattern (which is 24 pages) and tape the sheets together, but the pattern pages come together easily and it doesn’t take too long given that it’s a relatively simple pattern. You also have to add your own seam allowances.

Just like my Day to Night Drape Top, I started with the XL at the shoulder, graded out to the 2X size at the armscye, and then graded to the 3X for the waist and hip. I cut the 2X size for the sleeves. Also did a small FBA to add just a bit of extra width and length to the front of the shirt, once again using this tutorial from VickiKateMakes to do an FBA without adding a dart. After those relatively quick adjustments, I’m really happy with the way this fits. The fit through the shoulders is especially nice. However, the sleeves are drafted to be quite long. I didn’t add a hem allowance to the pattern piece and still ended up cutting off 1.5” of length before turning the hem up 1.” Just something to keep in mind if you’re looking at making this pattern.

I was a bit nervous about sewing the neckband since that’s the step that gave me the most trouble the last time around. With my Kwik Sew Tee, I ended up sewing the neckband in flat, but I’m not a huge fan of the way this looks. So with this tee, I quartered and stretched the neckband per the pattern instructions. I did, however, machine baste the neckband first so I could check the fit. It laid flat everywhere but at the front of the scoop where it wanted to flip out a bit. So I unpicked the neck band and shortened it by 3/4”. I quartered the neck band again, but then moved the pins marking the quarters at the shoulder (in other words, the pins that didn’t mark the center front or center back) 3/8” closer to the the center front. This kept the neckband the same length around the back of the neck as the first version and only shortened the neckband around the front of the scoop. I repeated the basting process and the neckband looked good, so I sewed it in with the lightening stitch I use to sew all of my seams and then top-stitched the neckline with a narrow zig-zag.

I hemmed the bottom and the sleeves with a stretch twin needle. It looks nice, but I’m not sure how I feel about the twin needle. While the twin needle looks like a hem on a RTW shirt and has some stretch, it isn’t as stretchy as a cover-stitched hem. I think that will be fine for this tee, but we’ll see how it wears in the long run.

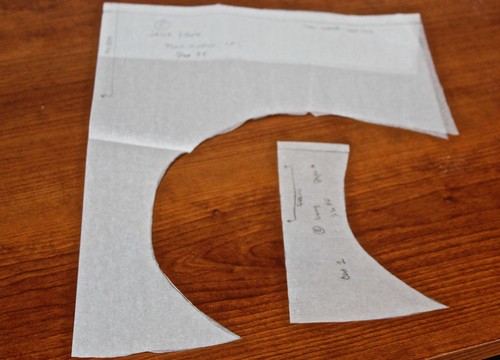
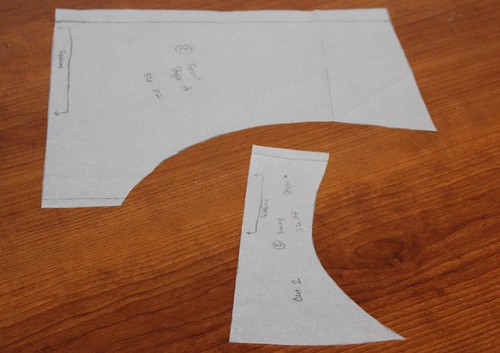
The fabric I used makes this shirt even more enjoyable to wear. It’s a cotton/rayon/spandex blend from Girl Charlee that is stretchy, drapey, and super soft.  (I bought it awhile ago but I think it’s this fabric, which they still have quite a bit of.)  With my last two knit projects, I had a bit of a time trying to cut the pattern out on the fold, less so because the fabric wanted to shift and more so because it was difficult to got both layers completely smoothed out. With both projects, I ended up with some slightly wonky pieces that I had to trim down a bit. Not ideal. So this time around, I sucked it up and re-traced the pattern pieces meant to be cut on the fold so that I could cut everything out in a single layer. The tracing was an extra step and meant a bit more pinning and cutting, but it’s one of those situations where doing what seems like extra work actually saves you a lot of time and energy in the long run.

I’ve got a couple other pieces of jersey fabric that I’m planning to turn into t-shirts. I’m finding it hugely satisfying to sew my own basics, probably because I’m a no-frills person who really only wears basics. But also because I’m finding it increasingly difficult to find basic items in actual brick-and-mortar stores since what little plus-size shit was in stores seems to be rapidly disappearing. (I’m looking at you Target and JC Penny.) How quickly do you think I can manage to make my own jeans?

Jalie 2568: Sewing Underwear

Today’s riveting topic: underwear! The six pairs of underwear you see below are the result of the past two weekend’s sewing efforts. Last weekend, I managed to cut out and construct several pairs and this weekend I spent my sewing time applying elastic like it was my job. I still have two more pairs constructed, but they’ll have to wait until I get some thread to match the blue elastic I’m planning to use.

Jalie 2568 via sweetalchemy.wordpress.com

I absolutely hate shopping for clothes as it is a series of never-ending frustrations at not being able to find clothes that fit me well, that match my style, and that are not made from the worst possible materials. This was my impetus to seriously take up garment sewing—there suddenly came a moment when it seemed easier to me to just make my clothes than to try to find things I liked in stores. While I had been toying with the idea of sewing my own clothes for awhile, it was trying to shop for underwear last year that proved frustrating enough to push me over the edge. There came a moment when I realized that, as a fat woman, my options for buying underwear in an actual brick-and-mortar store were 1) to get the super-thin kind that hit around your ribcage and only come in white or 2) to pay $5-$14 a pair from Lane Bryant, which at the time was featuring a line of underwear that all had spectacularly irritating things like “sassy” written on the butt.

By then, I had already been following the blog So, Zo… and had read her numerous posts about how easy it was to sew underwear, and I figured, it can’t be any fracking harder to make them than it is to try to buy ones that aren’t the very essence of terrible. So I dusted off my sewing machine, dug up a handful of old t-shirts, and dove in. There ultimately came a moment where my old, crappy machine couldn’t manage sewing through two layers of elastic and a layer of fabric, which put my underwear production on hold for a few months. But before that point, I repurposed a lot of t-shirts as I played around with the pattern, tried out some different construction methods, and experimented with elastic in different ways. With this most recent batch of underwear, I’ve finally adjusted the pattern and sewing procedure to yield exactly the fit and finish I want. And that makes this my first tried and true (or TNT) sewing pattern—an important milestone for a sewing noob!

The pattern I’ve been using is Jalie 2568, which has options for either a bikini or hipster style with two different rises, as well as a pattern for stretch-lace boy shorts and a camisole. I picked this pattern primarily because it came in my size, but it also had really positive reviews. I’m really pleased with this pattern—it comes together quickly and it fits me perfectly right out of the envelope. It’s designed for fabrics with some Lycra content and says that your fabric should have 70% 4-way stretch, but I’ve almost always used fabric that has significantly less stretch—for any fabric with less than 50% stretch, I just cut out the next size up. Every pair shown here is the low-rise hipster style. I construct the underwear entirely on a regular sewing machine, using a narrow zig-zag stitch for the seams and a 3-step zig-zag stitch to attach the elastic. While I’ve made the pattern straight from the envelope, following the pattern instructions exactly, with good results, I have made two key changes to the way that I construct my underwear.

1. Using Fold-Over Elastic.

I’ve been using fold-over elastic (or FOE) to finish my underwear because I like the way that it looks, and I like the way that it encloses the raw edge. It’s also relatively inexpensive and easy to find. Most recently, I ordered a bunch of 5/8” FOE from an Etsy store called Elastic By the Yard. They sell elastic in a ton of different colors with lots of options for getting different yardage amounts–I got a couple of different 5 and 10 yard spools, which are really convenient, and the price ends up being under $.50/yard. A lot of sellers refer to FOE as “baby headband elastic,” which I find obnoxious, but obviously not so much as to prevent me from buying it.

As is, the Jalie pattern recommends using 1” stretch lace around the waist of the underwear, which means that some of the finished height of the rise comes from the height of the elastic. Because FOE doesn’t add any height, I’ve lengthened the waist on my pattern pieces by about 3/4”. The pattern also recommends simply hemming the legs of the hipster style rather than attaching elastic. I did this with most of my early pairs and while it’s comfortable, I can attest that if you wear pants with any kind of stretch content, you will seriously benefit from having elastic around the legs to keep things . . . properly anchored. I use the same elastic at the legs that I use at the waist and apply it using a 2-step method similar to that described in this tutorial from A Very Purple Person. While I cut the waist elastic to be 10-15% smaller than the waist measurement of the pattern pieces, I only cut the elastic for the legs a bit smaller (somewhere between .5” and 1” smaller) than the leg opening. I will say that, once attached, the FOE feels stiffer than the elastic you’re probably used to seeing on RTW underwear, but it feels really comfortable while wearing.

2. Changing the pattern to have a separate, sandwiched gusset.

The Jalie pattern includes 3 pieces—a front, a back, and then a lining piece that you sew together with the bottom part of the front. This means that the (and I apologize in advance for having to use this terrible word) crotch is part of the front pattern piece. You can see the original pattern pieces for the front and the lining, which are both cut on the fold, in the photo below. This method works perfectly well, but it does leave one edge of the lining exposed and the longer front pattern piece makes it tricky to eke a pair of underwear out of a small piece of fabric.

While reading underwear-sewing tutorials, I saw several people using patterns with an entirely separate crotch gusset piece that, when sewn together with the lining, completely encloses the front and back seams. I decided to alter the Jalie pattern to use this construction method—it was really simple and took about 60 seconds to complete. I simply laid the original lining piece over the bottom of the front piece and drew a line across the top of the lining piece—this line becomes the new seam line for the front piece. I then added a 1/4” seam allowance to the bottom of the new seam line on the front piece and the top of the former lining piece.

Jalie 2468 Alterations via sweetalchemy.wordpress.com

The photo below shows my altered pattern pieces. What was just a lining piece is now the pattern piece for the crotch gusset and lining. When I am cutting out my fabric, I now cut out a front (with the altered pattern piece), a back, and two of the lining/gusset pieces and then construct them as shown in Very Purple Person’s underwear sewing tutorial. This method gives a really satisfying, clean finish to the inside of the underwear. The altered pattern pieces have also made it possible for me to get two pairs of underwear out of 1/2 yard of fabric.

So there you have it—a really long post about making underwear. Underwear seems to be to sewists what dishcloths are to knitters—lots of people swear by their me-mades and lots of other people can’t imagine why you’d bother making something so basic that will see so much use and abuse. I’m firmly in the camp of swearing by my me-mades and have set myself a goal of replacing all of my RTW underwear by the end of the year. So onto the next pair!